Over the past few years I’ve been making a concerted effort to reduce the amount of meat my family and I eat. While I could never contemplate being vegetarian, it’s very important to me that I don’t bring up my children to consider meat as a basic, ‘everyday’ kind of ingredient, but much rather a luxury ‘treat’ food. This is for a variety of reasons: to avoid unnecessary cruelty to animals through intensive farming methods; to reduce our impact on our environment; and to improve our overall health.
It hasn’t always been easy. At first it was my husband who showed the most resistance – his attitude was that a meal wasn’t a proper meal unless there was a meat component. Then there were complaints from the children when I refused to take them to McDonald’s for a Happy Meal. “It’s not fair,” they’d whine. “Our friends at school get to go with their parents!”
But recently I think we may have turned a corner with both our girls. Our oldest,who started secondary school in September, has started talking about wanting to be pescatarian – inspired by her new (vegetarian) school friends – and is keen to learn to cook her own meals. And our youngest, now eight, who has always been a somewhat stubborn carnivore, actually asked for a second helping of tarka dal. Yes, you read that right. My daughter asked for more lentils. Lentils! Admittedly, she asked for “more of that meaty thing” but once I explained all the dishes on the table were vegetarian it then became clear that by ‘meaty’ she meant ‘tasty’.
It’s National Vegetarian Week – yay – a week to celebrate all things vegetastic! Now, with a blog called Bangers & Mash, it’s clear I do enjoy eating meat, and yet I am not a raging carnivore through and through. These days I’d say my family eats meat-free two to three days every week, and for all kinds of reasons – environmental, health, variety, taste and budget.
I love discovering new ways to enjoy a vegetarian diet and convincing my family a dish doesn’t require a meat component to make it a ‘proper’ meal – without feeling like I’m simply opting for vegetarian alternatives to meat. That’s why I’m giving this new meat-free range from HECK a big thumbs up… Continue reading “Thumbs up for… HECK’s new meat-free range”→
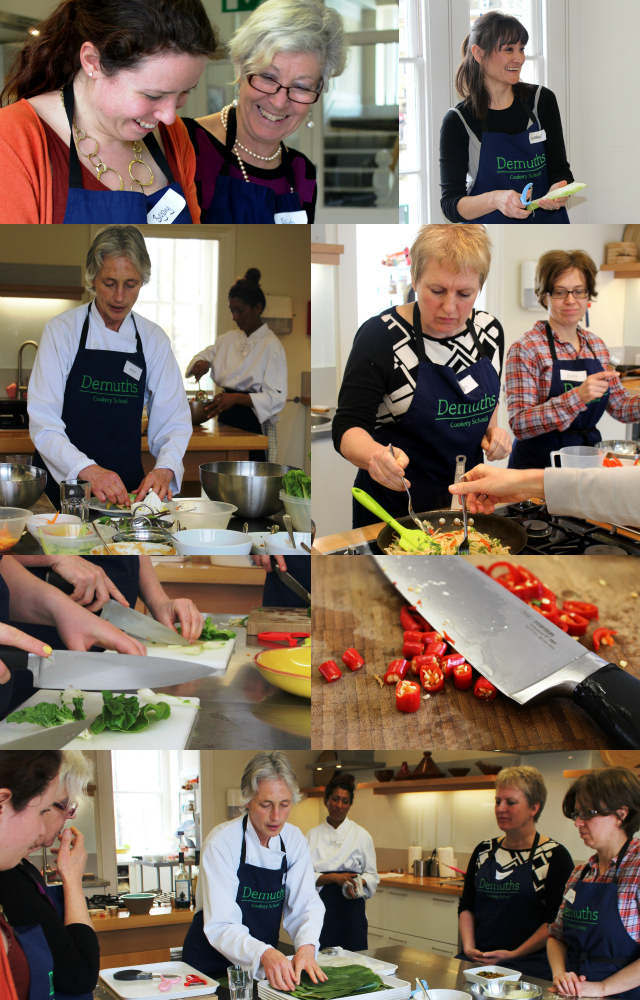
Blogging under the moniker Bangers & Mash, it’s pretty obvious I am a carnivore. But in recent years I have drastically reduced the amount of meat I eat, for both health and environmental reasons, and view it much more as a luxury food rather than every day staple. I’m always looking for new ways to cook more varied and interesting meat-free dishes and so when I was invited to try out a course at Demuths Vegetarian Cookery School in Bath I jumped at the opportunity. Continue reading “Cooking Asian Street Food at Demuths”→
This is my second dish for Save the Children and the Live Below the Line challenge.
From 29 April, thousands of people will be getting sponsored to live below the extreme poverty line for five days, with just £1 a day to spend on all their food and drink. I’m not sure I could do it. But I’m playing my part, in a very tiny way, by trying to come up with some vaguely tasty dishes that cost less than 40p a serving to prepare from scratch. My first offering was a Virgin Bloody Mary soup made from cheap tinned tomatoes and a red pepper, costing less than 34p a bowl.
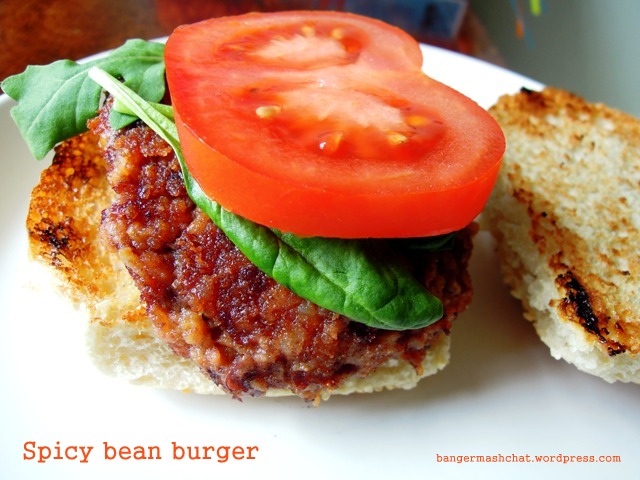
I’ve managed to save an extra halfpenny (not that they exist anymore) with these spicy bean burgers. Based on cheap tinned kidney beans pimped with garlic, cumin and paprika, this recipe creates four burgers costing just 33.5p each. You could probably even allow yourself a dollop of mustard or tomato ketchup. What luxury! But no skinny fries on the side I’m afraid.
Heat 1 tablespoon of the oil in a frying pan and gently fry the onion until soft and golden. Add the cumin, paprika and garlic and fry for a couple more minutes but don’t let the garlic brown.
Remove from the heat and leave the onion, garlic and spices to cool a little before you add them to a food processor. Next add the drained kidney beans, breadcrumbs, salt and pepper. Blitz but not for too long – you want a fairly chunky texture. Shape by hand into four patties.
Heat the remaining oil in the frying pan and fry the burgers over a medium heat until cooked through and crispy on the outside. Turn them over gently to prevent crumbling.
Serve in toasted buns with a slice or two of tomato and some lettuce leaves.
As with my last Live Below the Line dish, I’m also entering this into April’s Credit Crunch Munch co-hosted by Helen from Fuss Free Flavours and Camilla from Fab Food 4 All. If you’re looking for frugal food ideas, this is a very good place to start.
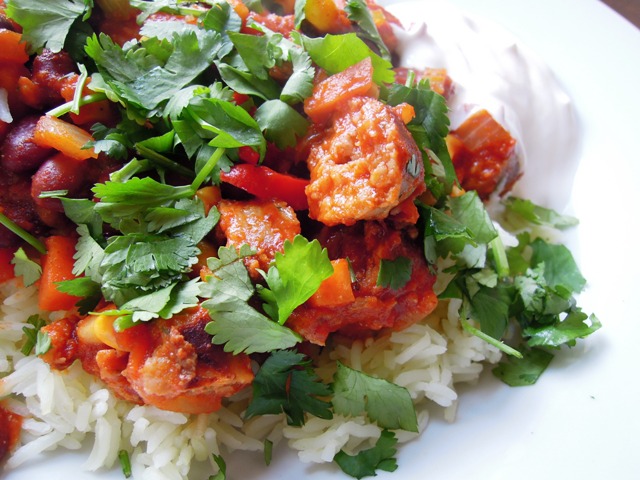
I feel a bit of a fraudster posting this sausage chilli on my blog.
Firstly, it’s not actually my recipe. It comes from Sarah over at The Garden Deli, who is as talented in the kitchen as she is in the garden. Sarah really wanted to enter April’s Recipes for Life challenge – the three set ingredients this month are pork, sweetcorn and tomatoes. As a vegetarian, she obviously found the pork element a challenge too far. And so we agreed that Sarah would create a vegetarian dish and I’d then try out her recipe to see if it would also work with meat.
The second reason I’m feeling a little fraudulent is because I wasn’t even the one to try cooking Sarah’s dish. I handed that honour over to my husband Jason. This means Sarah’s recipe received a proper testing. Not that Jason’s a bad cook. He’s actually a very good cook indeed and is probably one of the main reasons I got into cooking in the first place. No, it’s not a case of him being useless in the kitchen and needing clear instructions. It’s just that he is very thorough and precise and when he’s following a recipe, rather than his own instincts, he’ll follow it to the absolute letter.
The verdict? We all loved Sarah’s sausage chilli and can wholeheartedly confirm it works just as well with pork sausages as it does with vegetarian ones. Jason found the recipe instructions absolutely faultless (although his hands are clearly much larger than Sarah’s when it comes to measuring coriander by the handful) and he had no problems on that score. It’s a feast of colours, flavours and textures, and perfect for little ones as it has just the right level of spice without being too hot. This is my kind of tasty, healthy, family food and a recipe I’m sure we’ll be coming back to again and again. Thank you Sarah!
You can find Sarah’s original Sausage Chilli recipe here. We hardly played with it – simply substituted the vegetarian sausages for pork ones, and used frozen sweetcorn instead of tinned.
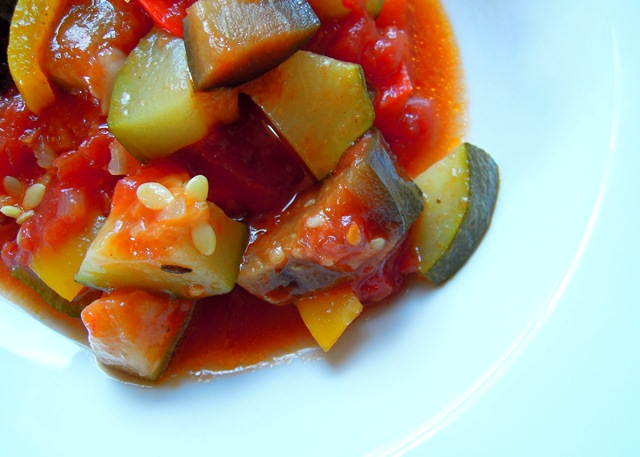
Along with my tasty chicken rice, this easy ratatouille is my go-to meal when I’m stocking the freezer with quick weekday meals for the kids.
Now that I’m working over in Wells four days a week, ratatouille appears regularly on my meal plans. It’s particularly good for those days when I’m not back home til late and my husband has little time to get the girls back from school and fed before taking them off out again to their various clubs and activities.
My girls have been eating ratatouille since they were very little, when I’d mash it up for them a bit. They still love it today, served either on its own with a hunk of bread to mop up the juices, with rice, pasta or a baked potato and sprinkled with cheese, or as a veggie accompaniment to sausages or chops.
This is one of those recipes you can play around with. If you’ve got herbs to hand, throw in some of those. If you don’t like cumin, leave that out. The quantities of aubergine, courgette and pepper vary each time I make it, but this should give you the general idea.
Easy ratatouille
Makes 8-10 servings
2tbsp olive oil
½tsp cumin seeds
1 large onion, peeled and chopped
2 cloves garlic, peeled and crushed
1 red bell pepper, deseeded and chopped
1 yellow bell pepper, deseeded and chopped
3 courgettes, chopped
2 aubergines, chopped
1 bay leaf
2 400g tins of chopped tomatoes
Salt and pepper
Preheat the oven to 200ºC / gas mark 6.
Heat the oil in a large ovenproof casserole dish and fry the cumin seeds for a minute or so.
Add the onions and fry gently until golden, then add the garlic and fry for another minute before throwing in the red and yellow peppers.
Saute the peppers until they have slightly softened and then add the courgettes. Continue to saute for a couple of minutes and then add the aubergine. You may need to add a little more oil to the pan at this stage. Keep stirring the vegetables until they’ve started to colour, and then add the bay leaf, tomatoes and season to taste.
Put the lid on your pan and pop in the oven for 20-30 minutes. If it’s a little too liquid for your liking, remove the lid and cook for another 5 to 10 minutes. Leave to cool before dividing into freezer bags.
Whenever I bake bread I always find myself marvelling at just how easy it is to make something that tastes and looks so good for such remarkably little effort.
While it might take a little time and is therefore not the kind of foodstuff I fancy making after a long day at work, baking bread is definitely my idea of a perfect weekend activity. And home-baked bread makes for a perfect weekend lunch, served still slightly warm from the oven with a spread of tasty cheeses, cold meats, olives and salad.
Baking often makes me a little nervous as the end result is usually meant to look neat and tidy. But thankfully bread is different and focaccia in particular should look a little rustic and rough around the edges. Which is obviously another reason why this is my kind of bread.
You can top your focaccia with whatever you fancy really – a light scattering of your favourite herbs, cheese, olives, or maybe someone caramelised onions and sun-dried tomatoes. But here I use my all-time favourite: basil and garlic.
Basil and garlic focaccia
500g strong white bread flour
15g salt
15g sugar
10.5g dried yeast (one and a half 7g sachets)
300ml lukewarm water
Semolina
2 cloves of garlic, finely chopped
Large bunch of basil, finely chopped
3 tbsp olive oil
Half a lemon
Salt and pepper
Put the flour, salt, sugar and yeast in a large bowl and mix together. Make a well in the middle and pour in the water. Gradually work the dry ingredients into the liquid to form a soft dough. If it’s still a little dry, add a drop more water; if it’s too sticky, add a little more flour.
Flour the work surface and tip out the dough onto it. Knead the dough for five to ten minutes until it is elastic and smooth. Return the dough to the bowl, cover with a clean tea towel and leave to rise in a warm, draught-free place for around an hour, until it has doubled in size.
Remove the dough from the bowl and give it a punch to knock the air out of it. Knead for another minute or so.
Split the dough into half. Roll each half into a rough circular shape about half an inch thick. Place the dough on a baking tray dusted with semolina.
In a small bowl, mix together the chopped basil, garlic, olive oil, lemon juice, salt and pepper. Smear generously over the top of each piece of dough. Then push your fingers deep into the surface of the dough to make those little holes you always see on focaccia, allowing the flavours to get down deep inside the bread. Leave in a warm spot for another 45 minutes.
Preheat the oven to 200°C/Gas Mark 6.
When the dough has risen again to just over an inch thick, bake in the oven for about 15 minutes until the top is a beautiful golden colour. Drizzle the bread with a little more olive oil and sprinkle sea salt over the top. Leave to cool slightly but try to eat while still warm if you can.
As my focaccia features lots of lovely fragrant basil, I’m linking up with September’s Herbs on Saturday blog challenge, hosted by Karen at Lavender & Lovage. I’m looking forward to working my way through the delicious looking recipes that have been submitted so far, including Recipe Junkie’s rosemary focaccia!
There are certain vegetables I get quite excited about when they arrive in my weekly veg box. Like celeriac or asparagus. Or Jerusalem artichokes. But cauliflower? Whenever I see a cauliflower in there I must admit to giving out an internal groan. Cauliflower cheese again? is generally my immediate thought.
But the last time a cauliflower turned up, I decided to try and be a little more creative. I’ve tried making cauliflower curries a few times but they’ve never been wholly satisfying, although I know the idea of spicy cauliflower is a good one. A quick search on the internet led me to this very tasty and spicy cauliflower soup recipe, which elevates the humble cauliflower to heady new heights. I found it on the Oxford Times website but apparently it first originated from a recipe in the Women’s Institute’s book Soup for all Seasons.
It’s incredibly easy to make and, despite looking quite a heavy soup, is surprisingly light and very fragrant. I swapped the Thai green curry paste for the red version, as it’s slightly milder and hence more child-friendly. I also used low-fat coconut milk but feel free to go full-fat if you prefer.
I served the soup with garlic and coriander bread. Again, very simple. Slice your baguette all the way along on the diagonal at intervals of an inch or so, just as you would for normal garlic bread. Fill each slash with a generous spread of butter into which you’ve mashed crushed garlic and chopped fresh coriander. Wrap the baguette in foil and bake in a hot oven for 10 minutes. To brown it slightly, open up the foil for the last couple of minutes. Easy as.
But now back to the main event…
Thai-style cauliflower soup
Serves 4
1 tbsp sunflower or vegetable oil
1 onion, peeled and finely chopped
1 tbsp red Thai curry paste
1 potato, peeled and diced small
1 cauliflower, broken into florets
3 cloves of garlic, crushed
400ml tin of low-fat coconut milk
300ml vegetable stock
Small bunch fresh coriander leaves, finely chopped
Salt and pepper
Spring onions, finely sliced to garnish
In a large saucepan, gently cook the onion in the oil until golden. Add the red curry paste and cook for a minute, stirring constantly.
Stir in the coconut milk and stock and bring to a simmer.
Add the potato, cauliflower and garlic and simmer for 15 minutes. Leave to cool a while.
Add the coriander to the soup and pour half into a liquidiser. Blitz until you achieve a smooth velvety finish, and then stir this back into the chunky soup in the pan. Check for seasoning and add if required.
Heat through again and serve garnished with a sprinkling of spring onions, and warm garlic and coriander bread on the side.
Before I go any further I want to say that Cranks today is probably quite different from how I remember Cranks growing up in the 1980s.
My step-mum was a big fan of Cranks. When we went shopping in the West End, we’d invariably end up in the Cranks restaurant just off Carnaby Street and we ate many dishes from their recipe book.
In case you don’t know Cranks, they’ve been around since the 1960s and were one of the first brands I’m aware of that were exponents of healthy eating. This of course is fantastic. But as a kid, I grew to associate Cranks with worthy food: brown rice, heavy wholemeal pastry, nut roasts and – this for me was the worst part – wholemeal pasta. Now I know we need roughage in our diet. But there is a right way and a wrong way to eat your fibre, and a bowlful of wholemeal spaghetti is for me most definitely the wrong way.
I’ve just taken a peek at the Cranks website. They are still going strong it seems and they look very different from the Cranks I knew growing up. There are some recipes I’d actually be quite interested in trying.
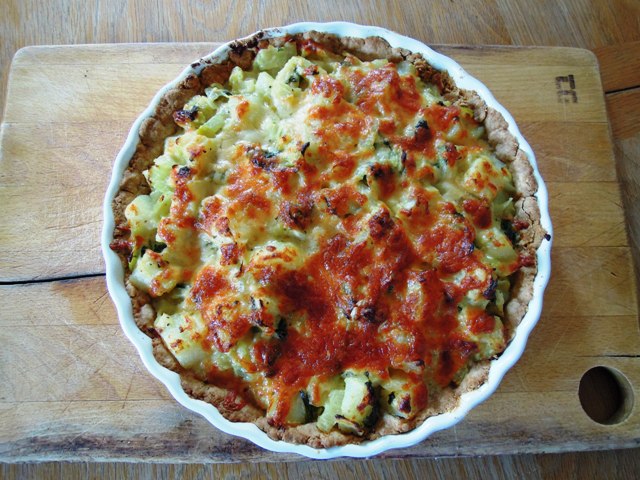
Despite my lack of enthusiasm for Cranks as a youngster, there was one dish that my step-mum could make time and time again from their recipe book and I’d be happy, and that was Homity Pie – a tasty open cheese and potato pie. OK so it was made with wholemeal pastry but I could cope with that when balanced with the lovely buttery, cheesey, garlicy potatoes and onions. As with all my favourite foods, so very simple and so very delicious. In fact, when I left home for university, this was the only recipe I copied out to take with me.
I’ve played with the recipe a little. I use half wholemeal and half white flour for the pastry. Sometimes I add ham or bacon to the filling. And quite often I add whatever leftover vegetables I happen to have in the fridge. Last time I baked it, I used half a celeriac I had hanging around, so this appears in the recipe below.
Homity Pie
For the pastry
100g plain white flour
100g wholemeal flour
2 tsp baking powder
pinch of salt
100g butter
3 tbsp water
For the filling
300g potatoes, peeled and diced
300g celeriac, peeled and diced
3 tbsp olive oil
450g onions, peeled and chopped
50g butter
handful fresh parsley, chopped
150g Cheddar cheese, grated
2 garlic cloves, crushed
1 tbsp milk
Salt and pepper
Preheat oven to 220°C/gas 7.
To make the pastry, place the wholemeal and white flour, baking powder and salt in a basin and rub in the butter with your finger tips until you have a breadcrumb-like mixture. Gradually add the water and mix in with a knife to form a dough. Wrap in clingfilm and leave in the fridge for 20 minutes.
In a large pan of salted water, boil the potatoes and celeriac until just tender, then drain and return to the pan.
Heat the olive oil in a pan and gently sautee the onions until golden. Add the onions to the potatoes and celeriac along with the butter, parsley, 100g of the cheese, garlic, milk, salt and pepper and combine well.
Butter your flan dish – I use one that’s 25cm diameter. Take your dough out of the fridge and roll out on a floured board. Don’t worry if it’s quite crumbly. Mine always falls apart a bit and I end up moulding it into position to line the flan dish.
Simply tip your ingredients into the pastry case, flatten it out a bit so the pastry is well covered and sprinkle with the remaining Cheddar cheese.
Bake in the oven for 25-30 minutes until the pastry is crisp and the cheese topping has melted and is golden brown.
Lasagne has always been one of my favourite foods. I loved it when my mother cooked it when I was little and I now love making it for my own children.
It’s not a quick dish to prepare though. In fact I used to think it was a bit of a faff. But these days, when I’m juggling work and family, it’s one of the meals I’ll make once the kids are tucked up in bed and I have the kitchen to myself, generally listening to Jo Whiley on Radio 2, all ready to eat the following evening. There’s nothing nicer than getting back from work and simply having to pop supper in the over and it’s all done.
We’re trying to eat less meat in our house. It’s partly to save money, partly for environmental reasons and partly to eat more healthily. And this is one of those vegetarian alternative meals where you really don’t miss the meat. It’s packed with big bold flavours and the aubergine and courgette give it lots of substance.
Because this meal is such a favourite with my clan, I’m submitting the recipe to The Pink Whisk Challenge, which is dedicated to raising awareness of Save the Children and the Hidden Hunger campaign.
Save the Children is asking everyone to Name a Day, a day when they will do just one thing to help save children’s lives. And they are asking David Cameron to do the same. It is a terrible fact that we live in a world with enough food for everyone, yet hunger is still able to kill 7,000 children every day. Can you help Save the Children put an end to this Hidden Hunger?
All the recipes gathered for the Pink Whisk Challenge will be collated and published in a Save the Children e-book to be sold to raise awareness and funds for the campaign. Do you have a family favourite to add? Please do. You have until 31 March 2012. Full details over at The Pink Whisk.
Use lots of fresh rosemary and keep the vegetables nice and chunky
Roast vegetable lasagne
Serves 6
For the roast vegetables
1 small onion, peeled and quartered
3 courgettes, chopped diagonally into thick slices
2 aubergines, chopped into large chunks
1 red and 1 green pepper, deseeded and sliced
6 cloves of garlic, skins removed
handful of cherry tomatoes
4 sprigs of fresh rosemary
salt and pepper
olive oil
For the cheese sauce
50g butter
40g plain flour
450ml milk
100g Cheddar cheese, grated
salt and pepper
For the tomato sauce
1 tbsp olive oil
1 small onion, peeled and finely chopped
2 x 400g tins chopped plum tomatoes
2 tsp balsamic vinegar
salt and pepper
250g lasagne sheets
Extra grated cheese for sprinkling on top
Preheat oven to 200°C/gas 6.
Begin by roasting your vegetables. Place them all in a large roasting tray along with the rosemary and garlic. Season generously with salt and pepper, pour over some olive oil and toss together to cover the vegetables well. Roast in the oven for around 40 minutes, turning the vegetables halfway through, until they are tender and beginning to brown.
The roast vegetables with garlic and rosemary smell sensational
While the vegetables are roasting prepare the two sauces.
The tomato sauce is very simple. Fry the onions in the olive oil until golden. Add the tomatoes and balsamic vinegar and stir together. Simmer gently for around 15 minutes until the sauce has thickened. Season to taste.
A very simple tomato sauce
For the cheese sauce, place the butter, flour and milk in a saucepan. Whisk over a gentle heat until it has thickened. Then stir in grated cheese until it has melted into the sauce. Again, season to taste.
When the vegetables are roasted, place a layer of these in the bottom of a large ovenproof dish. (Mine isn’t particularly large so I use a medium sized one and a small one.) Make sure you pull out the thick rosemary stalks. Nobody likes chewing on twigs.
Pour some tomato sauce over the vegetables and then cover with a layer of lasagne sheets. Repeat this process until you have filled your dish, ending with a layer of vegetables and then sauce.
Now pour over the cheese sauce. I like to wiggle the dish from side to side a little to make sure the cheese sauce seeps down the sides and through all the cracks.
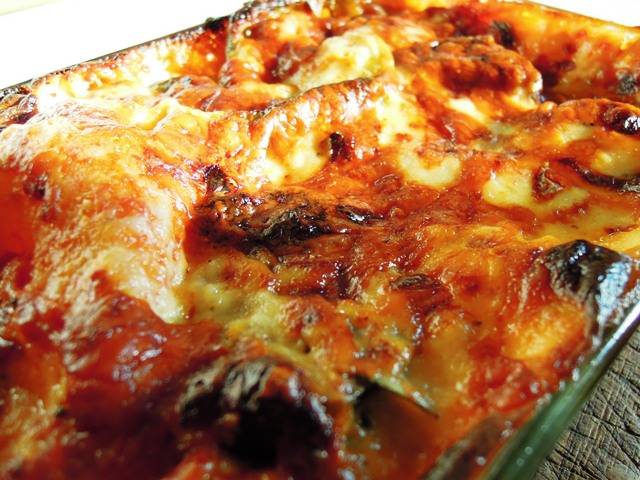
Finally scatter some grated Cheddar cheese over the top. Place in the oven for about 30 minutes until the cheese is browned and bubbly and a knife inserted goes easily through the pasta.
Perfect served with a salad and some homemade garlic bread.
Who can resist the molten cheese on top of a big bowl of lasagne?