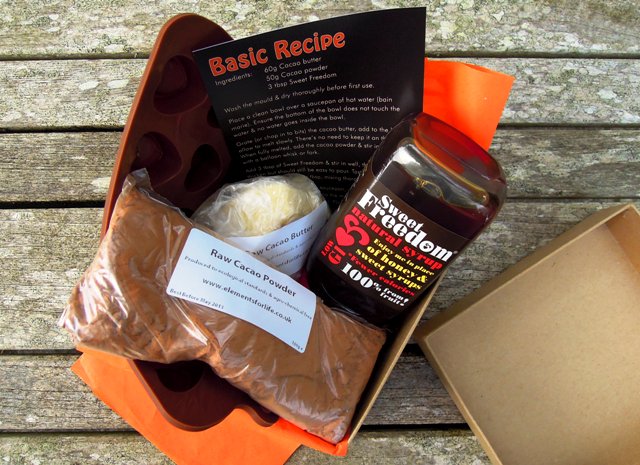
Jen’s prize consists of everything she’ll need to make a batch of gorgeous chocolates:
100g raw cacao powder
120g raw cacao butter
300ml bottle of Sweet Freedom, low GI natural sweetener
reusable heart-shaped silicone mould
information and recipe card.
On entering the contest, Jen said:
I like being able to make as much of my food from scratch as possible, so the chance to win a raw chocolate kit would be amazing. It’s something I’ve always wondered about doing but haven’t fully understood how to go about it before so thanks for your informative post and great pictures of the chocolate making process.
I really hope you enjoy making your own chocolates Jen, and do let me know how you get on! Congratulations again!
And look, I really did pull the winning name out of a hat…
Cake pops are very cute. After all, who doesn’t love food on a stick? I made some simple ones recently for a school cake sale and they sold out instantly. In fact, the school caretaker got in there first and bought some while we were still setting up.
I’ve seen lots of beautifully decorated cake pops on websites and blogs recently and for some strange reason I’ve felt an overwhelming urge to create some special cake pops for Halloween. Now this just isn’t the kind of thing I do normally. My interest in baking has increased massively over the last couple of years but creating cleverly crafted cakes and daintily decorated delights is way out of my comfort zone.
Admittedly, these little pumpkin pops are not an example of patisserie perfection I’m afraid, but they are a bit of fun and most importantly my children can’t get enough of them.
It took me a couple of attempts to get these Halloween cake pops right, mainly because white chocolate isn’t particularly easy to work with as a cake coating.
The first time it took me ages to get the colouring right. I was adding a drop or two of red liquid food colour, then a drop of yellow, and a bit more red, and a bit more yellow, ad nauseum. Eventually the chocolate just split and went all grainy and horrible because I’d over-worked it. I added a little vegetable oil to loosen it again, which seemed to work but then the coating refused to set properly on the cakes and they ended up looking a complete and utter state.
The second attempt was better. I used white chocolate again but went for a concentrate paste colouring and took lots more care not to overwork it. The end result, as you can see, is OK but I still haven’t ended up with the lovely smooth finish you get with normal chocolate. Next time – if there is a next time – I might try a white cake covering or ‘candy melts’ – it might taste ghastly but does that matter as long as it looks the part?
There are various ways to make the cake pops themselves. I have seen a cake pop machine on the market but that seems a little excessive to me. I bought a special cake pops baking pan, which works fairly well but I don’t think it’s completely necessary. I’ve since found a few pop cake recipes online using ready-made cake; you simply mix with chocolate and roll into balls. No baking necessary.
But if you do fancy going down the baking pan route, here’s what I did…
Halloween pumpkin cake pops
Makes 12
50g plain chocolate
60g butter
80g caster sugar
1½ tbsp cocoa powder
1 egg
50g plain flour
¼ tsp baking powder
pinch of salt
200g white chocolate
12 lollipop sticks
orange food colouring concentrate paste
2 tbsp jam
green ready-made icing
black writing icing
Preheat oven to 180°C / gas mark 4.
Grease the baking pan liberally with vegetable oil and dust with cocoa powder.
Put the plain chocolate and butter in a large mixing bowl and heat gently in a microwave or over a large pan of hot water until melted. Mix in the caster sugar and cocoa, and then stir in the egg. Finally add in the flour, baking powder and salt and combine well.
Spoon the mixture into a twelve-pop baking pan, filling each well so it creates a slight mound over the top. Put the lid on and secure.
Bake for 20 minutes until a toothpick inserted into one of the holes comes out almost clean. Leave to cool for five minutes in the pan before removing and leaving to cool completely.
Melt a couple of the pieces of white chocolate and dip the lollipop sticks in before inserting into the cake pops. Put in the fridge for half an hour to allow the sticks to set into place.
Line a plate or board with greaseproof paper.
Melt the remainder of the white chocolate in a large bowl. Using a skewer, gradually add in a little of the orange colour paste at a time, stirring gently after each addition, until you get the shade of orange you want.
Dip each cake pop into the orange chocolate using a metal spoon to pour over the chocolate and fully cover each one. Spin the cake to let the excess chocolate drip off. Place on the greaseproof paper and leave in a cool place or in the fridge for a few hours to set.
Heat the jam gently in the microwave and leave to cool a little.
Roll out the green icing and cut out leaf / star shapes. Stick the icing onto the cake pops using a little smear of jam.
Lastly draw on the faces using the black icing – triangles for eyes and noses and zig-zag mouths. Leave again in a cool place to allow everything to set into place. Preferably somewhere up high and out of sight, as when the little ones spot them, they won’t be around for long. Happy Halloween!
Isn’t the sight (and smell) of melted chocolate one of the most beautiful things on the planet? When I see melted chocolate, I want to jump right in, just like Augustus Gloop in Charlie and the Chocolate Factory!
In case it you hadn’t heard, here in the UK it is Chocolate Week (8 – 14 October 2012). And in preparation for this, I successfully spent much of the weekend in blissful chocolate heaven.
We had a rare lie-in on Saturday morning as Miss Bangers has had a bit of a cough all week so we didn’t want to chance her with her 9am ballet lesson. In celebration we breakfasted on pain au chocolat, dunked into hot chocolate.
The kids had their usual stuff from the supermarket but J and I went forFiery Raw Hot Chocolatefrom Elements for Life. It’s a very grown up hot chocolate, with a tasty kick to it. Despite the name, it’s not overly hot. I love it as an occasional alternative to my morning coffee. So, as you can see, a rather indulgent start to the day.
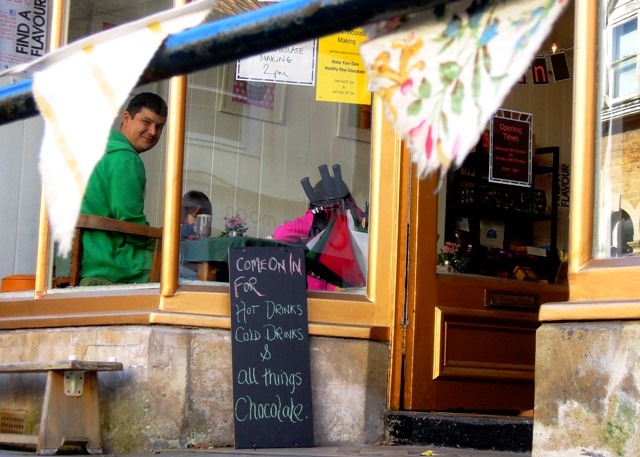
Once we’d got our Saturday chores out of the way, we headed over to the wonderful Lipsmacking Pop Up Chocolate Shop in Frome, open all this week until Sunday 14 October from 10am to 6pm. The Pop Up Shop in Frome’s Paul Street is a great little venue, and has been home to all kinds of in businesses in recent months, including a tapas bar and a children’s arts and craft workshop.
As well as selling all things cacao, the Chocolate Pop Up Shop is running a number of chocolate-themed events, from chocolate making workshops (see below) to meeting chocolatiers and even creating chocolate-inspired jewellery!
The Pop Up shop is very much a precursor to the Lipsmacking Chocolate Festival in Frome on Sunday 18 November 2012, which as you can imagine I am looking forward to. A lot!
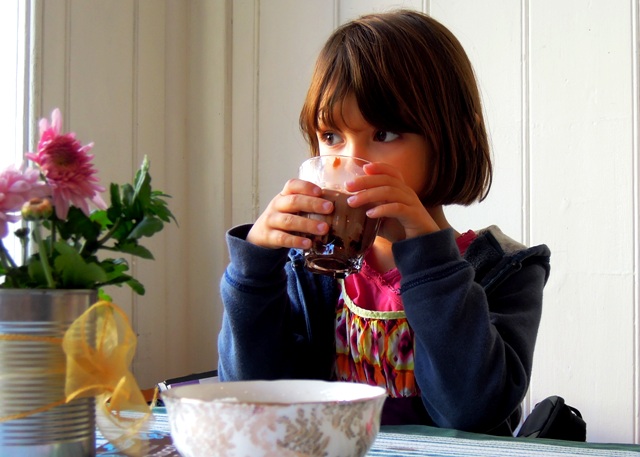
The children enjoyed chocolate milkshakes, while J and I indulged in yet more hot chocolate – this time a warming spiced number featuring cardamom, definitely my spice of the moment.
But the main reason we were there was to meet up with Paula from Elements for Lifefor a lesson in making raw chocolate.
Based just over the border in Wiltshire, Paula and Dan, the lovely husband and wife team behind Elements for Life, produce a wide range of handmade raw chocolate products. They are all dairy, gluten and wheat free, free from refined sugar, with no artificial additives, and packed full of goodness.
According to Paula and Dan, raw chocolate is much better for you than normal chocolate in so many ways, and having tried a number of their products I can certainly vouch for the fact that it tastes incredible.
The award-winning Yummy Scrummy raw chocolate brownie – one of my personal favourites
With normal chocolate, the cacao bean is roasted, destroying much of its nutritional value. Add to that all the refined sugar, fat and the myriad of other things added to it and you end up with something that’s bad for you. Raw chocolate on the other hand is actually said to be good for you. It is one of the richest sources of magnesium, essential for a healthy heart and clear mind, and contains much higher levels of anti-oxidants than either green tea or red wine. It’s packed full of essential amino acids, feel good chemicals and vitamins, and what’s more it is an appetite suppressant!
But health benefits aside, it tastes fantastic and that is essentially why I jumped at the offer to find out more about making my own.
Paula from Elements for Life melting the cacao butter – the smell was so good!
What surprised me most was just how easy raw chocolate is to make, particularly since, unlike normal chocolate, there is no fiddly tempering required. It’s simply a case of melting the raw cacao butter, mixing in the raw cacao powder, and sweetening with a low GI fruit sweetener.
It didn’t take too long for my two girls to get in on the chocolate-making action!
Once the melted chocolate has been poured into the silicone mould, you simply place it in the fridge for an hour and a half, or in the freezer if you can’t wait that long. Paula’s tip was to pour it into a small jug before attempting to pour into the mould, otherwise it can get very messy indeed. But then when you’re cooking with my children, nothing you do can prevent the mess!
Making raw chocolate would be the perfect activity for a children’s party, or even next time you have your friends over for a couple of glasses of wine. Or as Paula suggested, how about serving the melted chocolate in a hollowed out pumpkin for a Halloween fondue?
Paula shared with us all some chocolates she had prepared earlier and the end result is really very, very good. It’s ever so smooth and creamy, and despite being a dark chocolate, it isn’t nearly as bitter as most dark chocolates I’ve had before.
Paula’s demo made it all look very easy. Question was though, would I be able to recreate the same quality chocolate experience back at home with the kids? That was to be our challenge for Sunday morning.
So on Sunday, once we’d got breakfast and homework and Christmas card making (I know! our school PTA is über organised!) out of the way, our adventures in chocolate making began as we put the Elements for Life starter kit to the test. Simply grating the cacao butter filled the kitchen with the sumptuous aroma of pure chocolate.
The scent increased to even headier heights when we started to melt it.
Holding the little ones back from immersing themselves in the melted chocolate was the only tricky bit!
With one of Elements for Life’s raw chocolate making starter kits, I can categorically say that making your own chocolate is child’s play. It took us less than half an hour to make, and just over an hour later we were scoffing these little beauties:
I added a little sprinkle of confectioner’s glitter to the moulds before pouring in the chocolate. Pretty eh? As we had some leftover chocolate in the jug, I poured the rest out in a metal tray lined with greaseproof paper and sprinkled with some chopped nuts and currants to create my own chocolate slab. Isn’t that such a great word? Slab. Love it!
So there you have it. If I can make raw chocolate, then anyone can. As I mentioned before, raw chocolate isn’t as bitter as the normal stuff, and the other good thing is you don’t need so much either. Just a couple of mouthfuls and you’re satisfied. And coming from me, that says a lot. I can usually eat chocolate until I make myself sick. Trust me, this is good stuff. The kids loved it too, but for them the best bit was licking out the bowl. Isn’t it always?
While the kits themselves would make an excellent gift for the chocaholic in your life, my personal plan is to experiment a little with additional ingredients (such as more nuts and fruit) and give the chocolates themselves as Christmas presents.
During Chocolate Week (8-14 October 2012), Elements for Life is offering 10% off every product bought via their website, so now is a great time to stock up.
Win a raw chocolate making kit from Elements for Life
Now it’s your chance to win a raw chocolate making starter kit from Elements for Life worth £14.99. The kit includes everything you need to make a batch of gorgeous chocolates (and an extra slab too if you like!):
100g raw cacao powder
120g raw cacao butter
300ml bottle of Sweet Freedom, low GI natural sweetener
reusable heart-shaped silicone mould
information and recipe card.
To be in with a chance of winning, all you need to do is provide a comment below saying why you’d like to get your mitts on an Elements for Life chocolate making starter kit.
Double your chances by tweeting about this competition, linking through to this post and including the hash tag #MakeRawChoc and my Twitter name @bangermashchat. I’ll keep an eye out for your tweets but make sure yours doesn’t slip through the net by also mentioning you’ve tweeted in your comment.
The closing date for competition entries is midnight on Sunday 4 November. The winner will be the first name randomly drawn after the closing date.
Please note: this competition is only open to UK residents due to shipping costs and there is no cash or other product alternative.
Disclosure: I was provided with two complimentary raw chocolate making kits by Elements for Life; one for review and one for a competition prize. No money has exchanged hands, but honestly – would you expect me to want to be paid to review chocolate?
When I put out a call a month or so ago for people to send in their favourite family recipes for the Care to Cook recipe challenge I had absolutely no idea what kind of response to expect. Care to Cook is a challenge I set up with a fostering and adoption charity I work with called TACT in order to promote their cookbook, which they’re selling to support adopted children and their families.
But I had nothing to worry about. You lot rose to the challenge splendidly, supplying a fantastic assortment of family favourites, both savoury and sweet. The task set was to suggest a dish you would cook to welcome someone into your family home. For many children in care, family meals are simply something they are not used to. Each and every dish submitted into the challenge is one I know would make a vulnerable child or young person feel special, valued and welcomed.
Before I announce the winner, here are each of those delicious entries in turn. Warning – this list is guaranteed to make you hungry!
First in was this tasty little number from Under The Blue Gum Tree, which looks far superior to its McDonald’s namesake: Homemade Fillet O’ Fish and “Chips”. The fillet is served in lovingly prepared carrot and cumin bread rolls, with potato skins covered in paprika and cayenne pepper, and some salsa and soured cream on the side. Now, who could resist that?
Homemade Fillet O’ Fish and “Chips” from Under The Blue Gum Tree
Next we have French Madeleinesfrom Crêpes Suzettes. These pretty little cakes look so tempting and perfect for goûter, the snack French kids have at around 4pm. I think my children must be a bit French as they are always starving when they come home from school too!
French Madeleines from Crepes Suzette
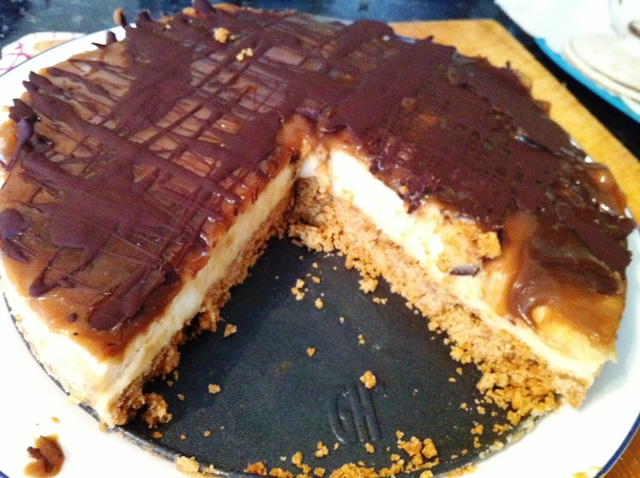
For Reluctant Housedad, what to cook for this challenge was a bit of a no-brainer. It had to be his Peanut Butter and Salted Caramel Chocolate Cheesecake. Doesn’t it look incredible? I love puddings that combine sweet and salty and absolutely anything that contains peanut butter, so this is going straight to the top of my must-bake list.
Peanut Butter and Salted Caramel Chocolate Cheesecake from Reluctant Housedad
My fabulous mother Cheryl suggested this next dish Hokkien Mee, which she remembers eating as a girl growing up on the Malaysian island of Penang. It’s a hot and spicy noodle dish, featuring both meat and seafood, common in many South East Asian dishes. It’s a little different to the Singapore version but, as my Mum would tell you, much more delicious!
Penang Hokkien Mee from Cheryl Leembruggen (photo via vkeon.com)
Karen from Lavender & Lovage offers up these ‘frugal but comforting’ Stuffed Tomatoes with Herbs and Oats, which I think look incredibly tasty and very satisfying. It’s a real family-favourite in Karen’s house; her daughter loved eating this when she was little, and still does now she is all grown up!
Stuffed Tomatoes with Herbs and Oats from Lavender & Lovage
My little sister Elly surprised me with her cooking skills with this next entry, her Nonya Chicken Curry from Malaysia. I just assumed she would submit a recipe for something sweet and sticky – she’s a great baker you see. But no, this is her curry dish that got a big thumbs up from her boyfriend’s dad. He’s from Malaysia himself and apparently not an easy man to impress!
Nonya Chicken Curry from Elly Rowe
Pasta and Pesto Sauce is our next entry which comes from A Trifle Rushed. Pesto is always a favourite in our house but I must admit it’s normally a meal-in-a-hurry using dried pasta and jarred sauce. Here Jude and her daughter lovingly make fresh pasta by hand and blend their own pesto in a pestle and mortar. I bet it tastes incredible; it certainly looks wonderful.
Pasta and Pesto Sauce from A Trifle Rushed
Louisa at Chez Foti now lives in the French Pyrenees and likes to cook classic French dishes whenever friends and family come to visit. This Boeuf en Daube is a particular favourite and I can see why; it looks so sumptuously satisfying! It’s one of those meals you can prepare in advance and leave to slow cook in the oven, so that your visitors arrive to the most glorious aromas emanating from the kitchen. Yum!
Boeuf en Daube from Chez Foti
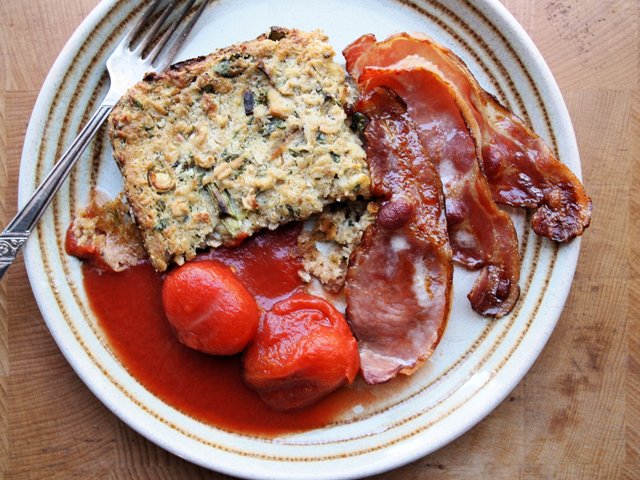
When I received this next entry from Lavender & Lovage for Yorkshire Season Pudding with Herbs I had to try it straight away. We had it for brunch one Sunday morning, and it was perfect with our bacon, eggs and beans. I like the fact this is a traditional family recipe, and one that Karen’s grandmother used to make. I think it might just become a tradition for our family too.
Yorkshire Season Pudding with Herbs from Lavender & Lovage
Spinach and Bacon Macaroni Cheesefrom Sian at Fishfingers for Tea is next up. Macaroni cheese is the ultimate in satisfying comfort food and I do love this version, beefed up with tasty bacon and spinach and finished with slices of tomato and crunchy cheesy breadcrumbs on top. Another great dish for preparing in advance and popping in the oven just before your visitors arrive.
Spinach and Bacon Macaroni Cheese from Fishfingers for Tea
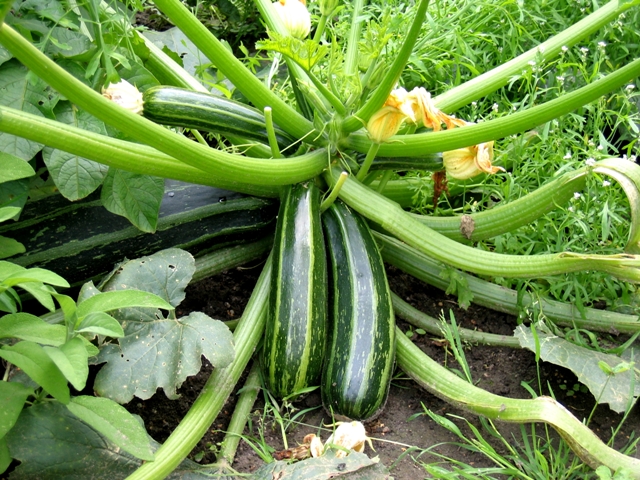
My Nana Barbara sent in two dishes for her entry: Courgette Bake followed by Vanilla Cream Terrine. She says the courgette bake works well both as a starter and as main course served with large hunks of crusty bread. My Nana is fantastic in the kitchen and as a kid I would love staying with her and Grandad as it always meant getting to eat lots of lovely cakes and pies.
Barbara’s Courgette Bake – perfect for anyone with a glut of courgettes on their hands
Chicken Basquaise is the delicious entry from Helene at French Foodie Baby. She warns that it might differ from traditional recipes but that’s what she likes so much about her mother’s cooking; she cooks from the gut. I love the way Helene relives her food memories through her blog and brings them into the present day as she cooks for her little boy Pablo.
Chicken Basquaise from French Foodie Baby
ThisStrawberries and Cream Birthday Cakecomesfrom my step-mum Sue and is the cake she bakes every June to celebrate my twin sisters’ birthday. I’ve always been very jealous of them having a summer birthday when strawberries are in season! Now wouldn’t you like this for your birthday cake each year?
Strawberries and Cream Birthday Cake from Sue Hamer
The final entry is one of mine: Hainanese Chicken Rice. It’s a dish I loved to eat when I was a little girl on trips to Penang with my mum and little sister. I had no idea how to make it so I turned to members of my Chinese-Malaysian family for a helping hand, and my Aunty Lorene and Cousin Sisi did the honours by providing this recipe. How would I ever survive without Facebook?!
Hainanese Chicken Rice from Bangers & Mash
There you have it – a fine collection of family recipes if ever I saw one! But there can only be one winner in the Care to Cook challenge, and the unenviable task of selecting a winner was given to 15-year-old Josh, who lives with one of TACT’s foster carers in the South West of England.
So a huge congratulations to Keith at the Reluctant Housedad for your fabulous entry, which Josh found he simply couldn’t resist! As winner of the Care to Cook family recipe challenge he will receive a copy of TACT’s Care to Cook recipe book, signed by the charity’s celebrity patron Lorraine Pascale.
Choosing one winner wasn’t easy but in the end our judge Josh couldn’t resist this Peanut Butter and Salted Caramel Chocolate Cheesecake from the Reluctant Housedad
And thank you to everyone who has taken the time to share their favourite family recipes, helping to raise awareness of this very worthwhile charity, which is working so hard to improve the lives of children and young people across the UK who haven’t had the best starts in life. More information of the work of TACT is available on their website.
I love chocolate mousse. It’s probably my favourite dessert in the whole world.
I love it even more because it’s just so easy to make and so versatile. You can add fruit or alcohol or a whipped cream topping, and make it with any type of chocolate you fancy.
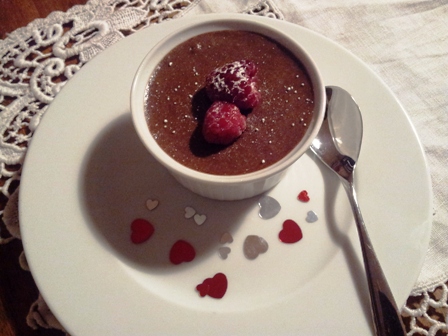
And this is my favourite recipe for chocolate mousse, which I’ve adapted from one I got from Riverford, my regular source of inspiration these days. As you’ll see from the photo, I last made it for our Valentine supper and I’ll be making it again at the weekend when friends come to stay.
Raspberry chocolate mousse
Serves 4
180g dark chocolate
2 tbsp milk
6 large eggs, whites and yolks separated
2 handfuls of raspberries (you can use fresh or frozen)
Icing sugar to serve
First of all, melt the chocolate. I tend to do this in the microwave – if it’s good enough for Nigella, then it’s good enough for me. Break the chocolate into small pieces and place in a bowl with the milk. Microwave on a low setting for a couple of minutes and then give it a stir. Put it back in again for another minute or so if it needs a little longer.
Alternatively use the ‘double boiler’ method. Put the chocolate and milk in a heatproof bowl over a pan of very gently simmering water. Make sure to choose the right sized bowl which doesn’t touch the water. Gently melt the chocolate and take care not to leave it on the heat too long.
Allow the melted chocolate to cool for a few minutes, while you whisk up the egg whites until they form soft peaks.
Beat the egg yolks and then stir these into the chocolate. Then gently fold a few spoonfuls of the egg whites into the chocolate until no traces of white remain. Continue folding in a little egg white at a time until it’s all combined into the mousse mixture.
Place a few raspberries at the bottom of four ramekins or small dishes or glasses, before spooning over the mousse. Chill for at least two hours (or overnight) and top with a couple more raspberries and a little icing sugar before serving.
I haven’t been writing a food blog for all that long, so when I was recently asked if I would do a review for the first time I almost fell off my chair. Especially since it was Hotel Chocolat doing the asking.
I’ve been a fan of Hotel Chocolat for quite some time. Whenever I walk past their shop in Bath I have to pick up speed and put my head down, as I know if I glance in, well that’s it. I’m a gonner. I’ll be in there spending the next week’s food budget on chocolate.
Hotel Chocolat invited me to review something from their Easter selection. Now, when I think of Hotel Chocolat, I think grown up chocolate. Dark, serious chocolate you need to take your time over and savour. Problem is, my blog is very much about family food. So I had to go against my instincts and choose something the whole clan could share, including my two girls age four and six.
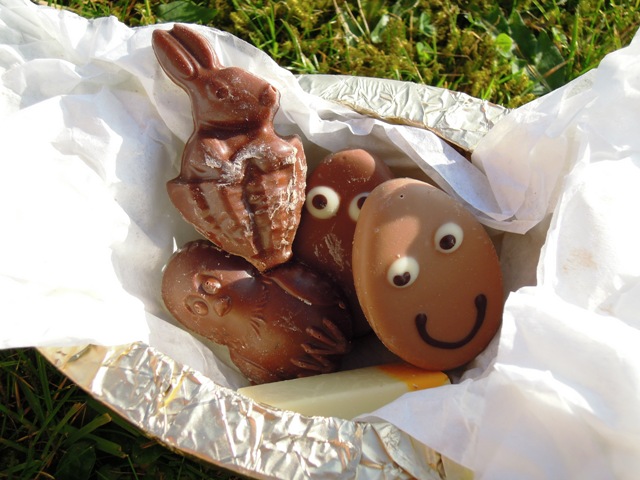
Our family-friendly choice was You Crack Me Up, which Hotel Chocolat describe as
“an irrepressibly upbeat egg cast in 40% milk chocolate and bursting with our cheeriest chocolates, from smiley face pralines and happy chicks to classic Easter bunnies.”
We were all very excited when the package arrived in the post. Jessie’s jaw literally dropped. Straight off they knew this was going to be a little bit more special than their usual Buttons or Smarties eggs. And when the extra thick chocolate egg was opened up to reveal an assortment of fun treats, the girls wanted to dive straight in.
The googly-eyed funny faces in particular appealed to the girls: two chocolate brownies and two crunchy pralines.
And the fried eggs and white soldiers were rather popular.
The girls were also rather partial to the extra thick chocolate shell. I love Hotel Chocolat’s story behind this…
“When we first started making eggs 12 years ago, we were advised by industry experts to use the least amount of chocolate by making them as thin as possible and to arrange the chocolates around the outside of the egg to make it look as big as possible. We did the opposite and made ridiculously thick shells with all of the chocolates hidden inside for extra Easter excitement.”
It works. Opening up the egg to discover what lies within takes me back to my own excitement as a child at Easter time.
So my daughters were duly impressed. Although when asked if they preferred the Hotel Chocolat egg to their usual Easter eggs, Mia’s response was that she’d rather have Buttons “because they taste better.” She is only four of course.
And what about me and my husband? I think it probably goes without saying that we enjoyed the chocolate array. It’s bloody good chocolate after all. But the earth didn’t move. And it usually does for me when I eat Hotel Chocolat.
I think the problem lay in me trying to choose an egg that I thought the kids would enjoy too. Of course the children liked it but then, they would happily sit and eat the contents of a jar of Nutella if you let them. We thought it was a nice egg but nothing amazing. We preferred the shell to the cheery contents. But it just wasn’t intense enough. And we’d have been a bit disappointed if we’d paid £26 for it.
So lesson learned. If I had the choice again, I’d go for Your Eggscellency. One half of the shell is milk chocolate, the other half is dark. With 12 truffles filled with soft cream ganaches with Champagne, Amaretto, vodka, mojito and more. Much more grown up, and I imagine much more my kind of chocolate. When it comes to chocolate, it seems, you need to be selfish. Mother love has no place here. Ah well, we all live and learn.
You’ll find the full range of Hotel Chocolat’s Easter creations here.
I am finally growing in confidence as a baker. For a long time I have thought of myself as a good cook but not a good baker. But slowly that is beginning to change.
Until recently I would never experiment with a cake recipe because baking just didn’t come naturally to me.
The world seems to fall into two camps: those who were born to bake and those who weren’t. I’ve always fallen into the second camp. But I’m gradually discovering that baking can actually be learned. It’s as much about confidence in the kitchen as anything, a bit of practice and not giving up the first time things go pear-shaped.
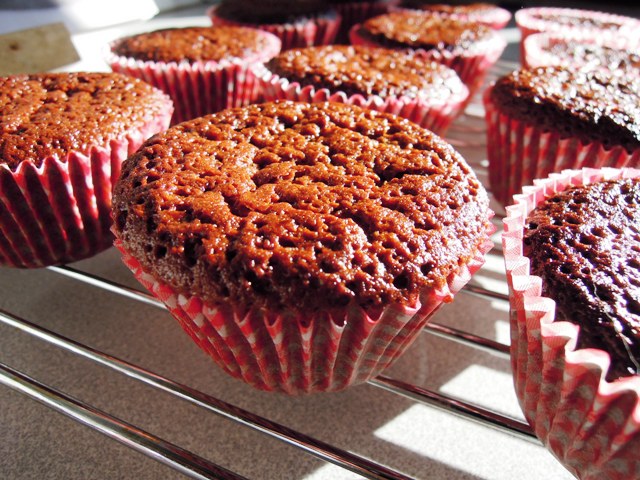
In recent weeks I’ve come up with my own recipe for pistachio scones and tried my hand at hot cross buns (recipe coming soon). And I’ve also come up with this recipe for chocolate orange cupcakes, which I’m really rather proud of. They’re sticky and gooey and indulgent and satisfying. My little girls asked for seconds. What more can you ask for?
Now don’t get me wrong. I’m not inventing recipes from scratch. Far from it. But I’m having fun playing around with other people’s recipes.
My experiments don’t always work out. A few weeks ago I tried making my version of a lemon tart using polenta and caraway. It was truly disgusting. I wasn’t too impressed with my Cheerio crunchies either – my attempt at using up a bulk purchase of a breakfast cereal my kids once loved then decided they no longer like.
Anyway, back to the chocolate orange cupcakes. The idea for these came from the good old Terry’s Chocolate Orange. Well, where else? I’ve used Nigella Lawson’s recipe for chocolate-cherry cupcakes as my starting point and then quite simply swapped the cherry ingredients for orange ones. Perhaps I’m being too honest here? That sounds too easy now I’ve typed it. But it did honestly feel quite inspired to me at the time…
Chocolate orange cupcakes
Makes 12
125g butter
200g plain chocolate
280g orange marmalade
1 orange, zest and juice
150g caster sugar
Pinch of salt
2 eggs, beaten
150g self-raising flour
100ml double cream
25g mixed peel
Preheat the oven to 180ºC/gas mark 4.
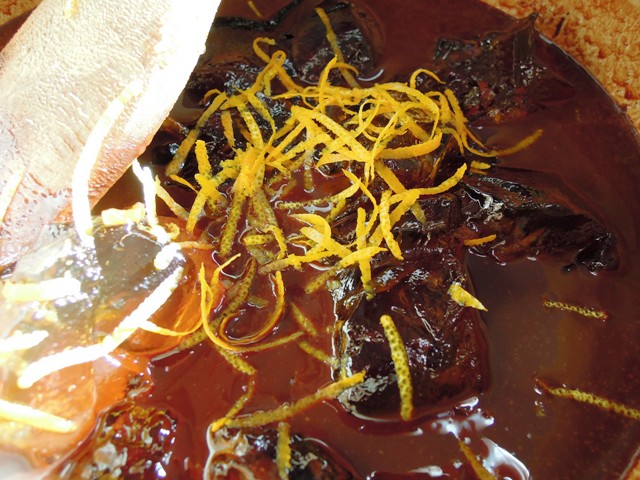
Melt the butter in a pan over a low heat and then add 100g of the chocolate. When the chocolate starts to melt, remove from the heat and stir in the marmalade, orange zest and juice, sugar, salt and eggs.
When it’s all mixed together well, stir in the flour.
Place 12 muffin paper cases into your muffin tin and spoon in the cupcake mixture. Bake in the oven for 25 minutes until the cakes have risen and are springy to the touch.
Cool in the muffin tray for 10 minutes or so, and then transfer to a wire rack until they are completely cool.
To make the icing, break up the remaining 100g chocolate into a saucepan and add the double cream. Bring to a gentle boil and then remove from the heat. Stir with a wooden spoon for a few minutes until the icing is smooth and thick. Use a tablespoon to ice the cakes and pop a few pieces of mixed peel in the middle of each one.
I just had a bit of a wobble and almost changed my mind about posting this recipe. Another blogger, a proper baking blogger with tonnes of followers, has just posted their recipe for chocolate orange cake. My confidence in my own food was zapped in a matter of seconds. But do you know what, I am going to press that ‘publish’ button. This isn’t a competition, after all. Is it?
For a while in the autumn we seemed to be getting beetroot in our veggie box pretty much every week. Now I adore beetroot so I was quite happy with this situation. Unfortunately the rest of my family do not share my passion for this colourful root.
So while I was rather enjoying eating roast beetroot to accompany a joint of lamb or baked beetroot in a salad with nectarines, I felt compelled to come up with new ways to serve beets in a slightly less prominent way. That’s how I came up with this gorgeous brownie recipe.
They really are surprisingly good. Much lighter than your average brownie and ever so moist. Everyone I’ve served them to, including my anti-beetroot family members, has wanted more.
And I love the way they are tinged with a subtle pink hue.
I’ve tried this recipe with both plain and milk chocolate. Plain is definitely best here.
Wash and trim the beetroot, place in a baking dish with half a centimetre of water, and cover with foil. Place in an oven preheated to 200° C /Gas Mark 6 and roast for around 45 minutes until tender. Leave to cool and then skin.
Turn the oven down to 180°C/Gas Mark 4.
Put the chocolate and butter in a large bowl and microwave on a medium heat for two to three minutes, until melted. Stir together well.
Finely chop / mush the beetroot in a food processor. Then mix in the eggs one at a time, followed by the vanilla and sugar. Keep mixing until smooth.
Stir the beetroot mix into the melted chocolate, and then sift in the cocoa powder, plain flour and baking powder and fold in carefully, along with the ground almonds, until the ingredients are combined.
Line a tin, roughly 28cm x 18cm, with baking paper. Pour in the mixture and bake in the oven for 30 to 35 minutes, until just firm to the touch. Don’t over-cook your brownies! When they’re ready, a skewer should come out ever so slightly sticky.
Leave to cool in the tin and then cut into squares. Keep in an airtight container and eat within two to three days. If they’re around that long, that is.
If you ever need to rustle up some cakes for a school cake sale, these should do the trick.
Totally unsophisticated, completely garish and obscenely sweet. Just what little children are looking for in a cupcake.
I made these last week for the Christmas Fair and they disappeared within minutes of the doors opening.
And they can’t be that unhealthy; they do contain banana after all.
Banana and chocolate cupcakes
Makes 8 cakes
1 large ripe banana
110g soft butter
110g caster sugar
2 eggs
½ tsp vanilla extract
110g self-raising flour
For the icing 60g plain chocolate
25g butter
2 tbsp milk
2 tbsp golden syrup
Sweets of your choice for decoration – Smarties, jelly beans, dolly mixture – go crazy!
Preheat the oven to 180°C / 350°F / gas mark 4. Line a muffin tin with eight paper muffin cases.
Beat the butter and sugar until pale and fluffy. Whisk the eggs and vanilla in a separate bowl, then gradually add the eggs to the butter mixture, beating well.
Peel and mash the banana and stir into the butter mixture. Sift and fold in the flour.
Fill the muffin cases with the mixture and bake for 20 minutes, until risen and golden. Leave to cool.
To make the icing, put all the ingredients in a bowl and microwave on a medium heat for a minute or two, and mix well.
When the cupcakes are cool, spoon over the chocolate icing and decorate with your chosen sweeties.