Review and giveaway: Copas Traditional Turkeys

Copas Turkey Collage

Normally I try not to start thinking about Christmas until at least the first of December. Yes, I know the decorations are already up in our shopping centres and our social media timelines are chock full of festive cheer, but it just seems wrong to be talking about Christmas until the first door of the Advent calendar has been peeled open.

Which is why it felt very strange to be roasting a turkey in November for this review. But at the end of the day, it’s really only a rather large relative of the chicken, so why consign it to just a couple of days in December? Our friends in the States will be consuming vast amounts of turkey this week after all to celebrate Thanksgiving.

Copas Traditional Turkeys is a small family business that has been producing free range, hand-plucked and game-hung turkeys just for Christmas for the last half a century. Based in the beautiful Berkshire countryside, Copas has a reputation for combining centuries old production methods with state-of-the-art facilities, as well as taking their time for a superior taste. Continue reading “Review and giveaway: Copas Traditional Turkeys”

Overnight roast spicy lamb shoulder – perfect for the Aga

overnight roast lamb with ras-el-hanout2

One of the joys of being an Aga owner is being able to pop a dish, be it a joint of meat or a casserole perhaps, into the bottom oven (the simmering oven) and forget about for several hours or all day, or in this case overnight, and when you return, it has magically transformed into the most succulent and tender of feasts.

As it’s a rather fatty meat, lamb is perfect for slow-roasting, as the fat keeps the meat mouth-wateringly moist. This slow-roasted shoulder makes for a very special meal, and since a large joint of lamb isn’t particularly cheap, I’d save it for suitably special occasions or big family gatherings. But the beauty of it is that’s so incredibly easy to do, yet tastes a million dollars. And I reckon you do get your money’s worth. One shoulder of lamb served seven of us for Sunday lunch, with plenty of leftovers for a further two more meals during the week. Continue reading “Overnight roast spicy lamb shoulder – perfect for the Aga”

Chocolate pancakes with berries & rose-scented yoghurt

Chocolate pancakes2 web

Pancakes are always a popular weekend breakfast in our house, and then when you go and add chocolate into the mix, well, who doesn’t love chocolate? So these bad boys are always a winner.

Served with juicy berries (I always keep a stock in the freezer so we can them all-year-round) and a heavenly perfumed rosewater yoghurt and drizzled with syrup or honey, these simple pancakes are elevated to celebration status, perfect for Valentine’s Day, Shrove Tuesday and birthdays. Continue reading “Chocolate pancakes with berries & rose-scented yoghurt”

Braised oxtail with smoked bacon

oxtail

Other than tinned oxtail soup as a child (which I don’t think really counts), I hadn’t eaten oxtail until just the other week when I got hold of some at my local butcher and decided it was time to try it out on my family.

I’ve been meaning to cooking with it for quite some time but for one reason and another hadn’t got round to it. It’s a wonderfully cheap cut and I’d heard how full flavour and “unctuous” it can be when cooked long and slow – perfect for us as we cook in an Aga.

And I certainly wasn’t disappointed. I turned to that classic Italian cookbook, The Silver Spoon, which I always tend to consult when faced with a new cut of meat, and found a recipe for a slow-cooked oxtail, cooked very simply with soffritto (onion, carrot, celery and garlic), white wine and pancetta, or in my case beef stock and smoked bacon.

The result was truly unctuous. So it might not be the prettiest of plates but it tastes divine. A properly rustic kind of dish which demands eating with fingers to make the most of all that gorgeously sweet meat clinging to the bones, with plenty of cartilage to be gnawed and marrow to be sucked. The vegetables seem to soak up the gooey, marrow-rich sauce making them beautifully soft, and a large helping of creamy mashed potato is just wonderful served on the side.

What did disappoint was how squeamish the children were about getting stuck in. This isn’t normally a problem in our house, where we’re used to sticky fingers and dribbly chins. Perhaps I left a little too much fat on the oxtail or maybe it was simply the idea of eating a beast’s rear appendage, but I was surprised at how much encouragement my kids needed to finish their plates.

Don’t worry, I never give up on the first attempt. This is definitely a dish I’ll be trying on the clan again soon. I loved it so much, it’s now my mission to make my family love it too.

oxtail

Braised oxtail with smoked bacon

850g oxtail, cut into pieces
2 tbsp olive oil
25g butter
3 rashers smoked bacon, chopped
1 onion, finely chopped
3 carrots, finely chopped
2 celery sticks, finely chopped
2 garlic cloves, crushed
500ml hot beef stock
salt and pepper

Remove any excess fat from the oxtail and then soak in cold water for three hours, changing the water a couple of times. Drain and pat dry with kitchen towel.

Preheat the oven to 140°C/gas 1.

Heat the butter and oil in a large ovenproof dish, add the bacon and fry for 5 minutes until coloured.

Add the oxtail pieces and brown all over.

Stir in the onion, carrot, celery and garlic and fry together for a few minutes before pouring in the hot beef stock. Add enough hot water to just cover the ingredients and season to taste.

Bring to a gentle simmer, then cover with a lid and transfer to the oven to cook for three to four hours, until the meat comes easily away from the bone and the juices have thickened.

Serve with plenty of creamy mashed potato to soak up all that delicious sauce. And make sure you have napkins to hand.

family-foodies

Oxtail is a very inexpensive cut of beef and so I am entering this dish into May’s Family Foodies challenge (hosted by myself and Eat Your Veg), where the theme is ‘Cheap and Cheerful’.

Credit-Crunch-Munch-Just-Pic

I’m also entering into Credit Crunch Munch, co-hosted by Camilla at Fab Food 4 All and Helen at Fuss Free Flavours, and this month guest hosted by Gingey Bites.

Dried fruit and nut balls

dried fruit and nut balls

Admittedly, these might look like something you’d hang out for the birds in winter but trust me, these dried fruit and nut balls are delicious. Ask my children – they love them in their packed lunches or after school as a quick and healthy snack.

They’re very easy to make and the recipe is extremely versatile – play around with the recipe and add your own favourite nuts and dried fruits. I’ve used dried apple in this version as I’d dried some of our own apples as one way of storing them. If you’ve never tried drying your own apples, you really should. The apples develop such a gorgeously intense flavour and they have a wonderfully satisfying texture, rather like chewing on a soft toffee but with none of the sugar-guilt. My girls can’t get enough of them.

Dried Apple Collage

If you fancy having a go, here’s what you do.

Peel and core your apples and cut into rings. Sprinkle with cinnamon or leave plain if you prefer. Spread out on a baking tray and put in a very, very low oven for a few hours. If you have an Aga you could put them in the bottom oven or do what we did and tie with string and hang in bundles over the top. They’re ready when they’ve gone all wrinkly and have gained that lovely chewy consistency.

We eat them as they are, chop them up and mix into plain yoghurt, or add them to homemade granola.

granola

But back to those dried fruit and nut balls. It’s simply a case of whizzing up all the ingredient in a food processor and then using your hands to shape the resulting mixture into balls or, if you prefer, bars. It’s a fairly messy business, which is probably why children quite like getting involved.

Dried fruit and nut balls

100g blanched almonds
100g walnuts
100g dried apple
100g dried fig
100g dried apricot
100g sultanas
20g dessicated coconut
1 tbsp vegetable oil
1 tbsp apple juice

Put the nuts and dried fruit into a food processor and process until it you end up with a mushy, sticky mixture.

Add the oil and apple juice and whiz again briefly to combine.

Mould the mixture in your hands into small balls and store in an airtight container in the fridge (for a couple of weeks) or the freezer (for a couple of months).

I wrap individual balls in foil, like sweetie wrappers, when I put them in the girls’ lunchboxes.

dried fruit and nut balls


Since my children enjoy them in their lunchboxes, I’m including both these fruit and nut balls and the dried apple in November’s Family Foodies challenge, which as you probably know has lunchbox ideas as its theme.

family-foodies

Wells Food Festival and double baked Cheddar cheese soufflés

Double baked Cheddar cheese souffles

Soufflés have something of a reputation for being a little on the tricky side. If any of the Master Chef contestants ever say they’re going to bake a souffle, there’s always a sharp intake of breath and concerned expressions. But really, they’re not all that hard to do. Admittedly this was only the second time I’ve ever attempted them but both times they’ve been a great success. So you see, if I can make them, anyone can.

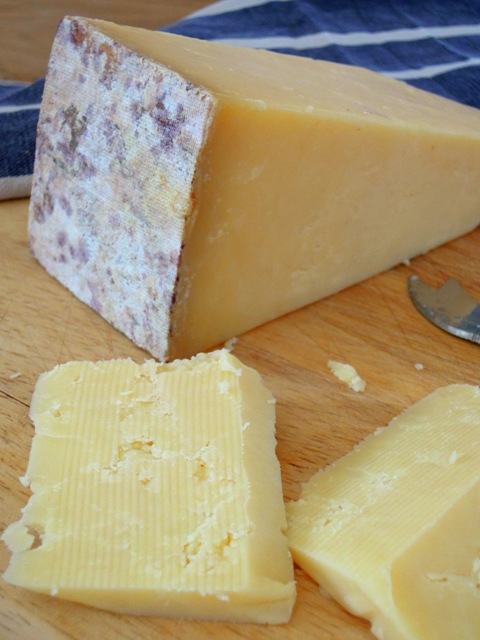
I used a lovely local Cheddar cheese in these soufflés. Dan Holland who owns the Queen Street Deli in Wells recommended Montgomery Cheddar, which is handmade on Manor Farm in North Cadbury. It’s a traditional, unpasteurised Somerset Cheddar, matured for 12 months to give it a gorgeously deep, nutty flavour.

Montgomery Cheddar

The Queen Street Deli is another local business taking part in the Wells Food Festival on Sunday 20 October. Dan is organising the cheese stand at the festival, which will highlight the fantastic wealth of Somerset cheeses we are lucky enough to have on our doorstep.  During the day, local cheese makers will take turns on the stall to share their knowledge and passion with visitors.  Dan is also selecting and sourcing the cheese for the Somerset Sunday Lunch in the town hall, which he describes as a great honour and a chance to showcase a few of his favourite and most popular cheeses.

Queen Street Deli

The Queen Street Deli is a small friendly shop, offering the best of local and continental food.  Dan opened it in 2008 when he decide to leave teaching maths at the local school and went for a complete career change, working with food – something that had been a bit of a dream for a while.

Despite the recession, he has managed to grow the business over the last five years, thanks to the support of his very loyal customers. “The greater percentage of our customer base is people who live in and around Wells, rather than tourists, which is great and hopefully means we are getting it mostly right!” Dan tells me. “Recently the opening of new supermarkets in Wells has created more challenging times but we are looking forward to a busy Christmas period and will be taking the usual orders for cheese, ham and hampers.”

I asked Dan what he thought this first Wells Food Festival means for the food and drink of Somerset.

“Hopefully it will reinforce and build on the reputation that Wells and Somerset already have as an area that produces and creates excellent artisan food and drink,” says Dan. ” It will certainly emphasise the diversity and range of quality products that we have all around us and be a real opportunity for the local businesses to promote themselves to a wide audience.”

So what are Dan’s personal favourites when it comes to Somerset’s food and drink?

“Obviously I have a slight bias towards cheese,” Dan replies. “We have some great Cheddars such from the likes of Barbers, Keens and Montgomery but I still think Westcombe is my fave.  I also really love the range of cheese produced by the Somerset Cheese Company in Ditcheat. Their Rainbows Gold is very popular in the deli at the moment; rich curd made with Channel Island cows milk then washed in Golden Chalice ale from Glastonbury.

“Beyond cheese I really like Mendip Moments Ice Cream and James Chocolates, two very local companies that produce interesting and tasty products that everyone loves. My latest top recommendation for eating out is Matt’s Kitchen in Bruton. There’s no menu as such – everyone eats what Matt is cooking that night, there’s a friendly, relaxed atmosphere and lovely food.”

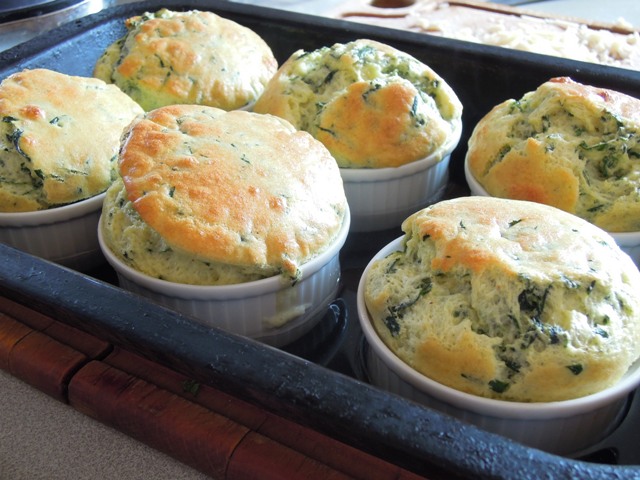
Armed with a decent chunk of Montgomery Cheddar, I returned home all inspired to bake my soufflés to hopefully celebrate a true taste of Somerset. The recipe is based on one I found in Mary Berry’s New Aga Cookbook for Swiss Double Soufflés, substituting her Gruyère for the Cheddar. It’s a perfect dish to cook in the Aga, but don’t worry – instructions for conventional ovens are also included below.

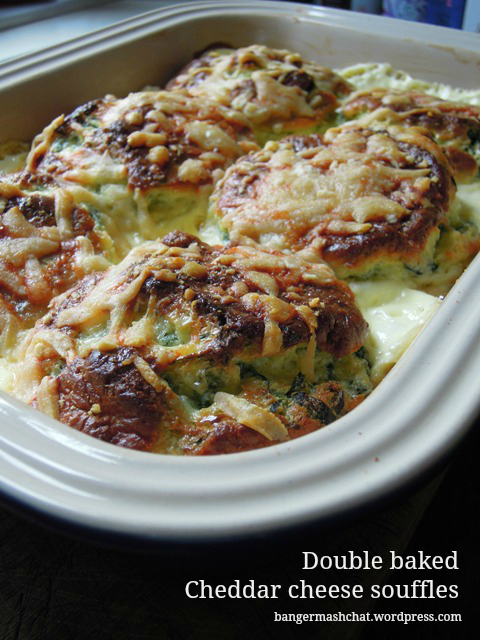
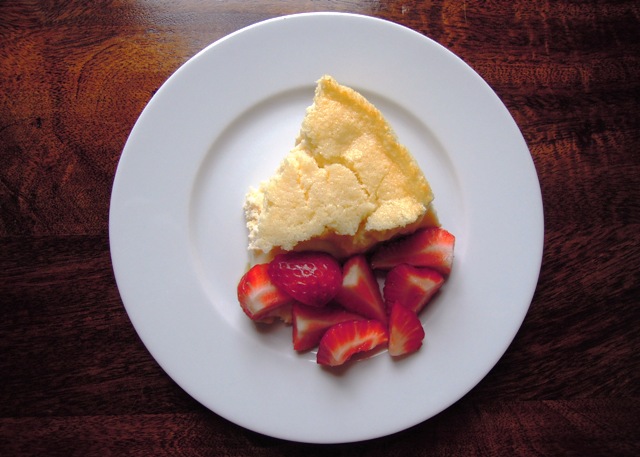
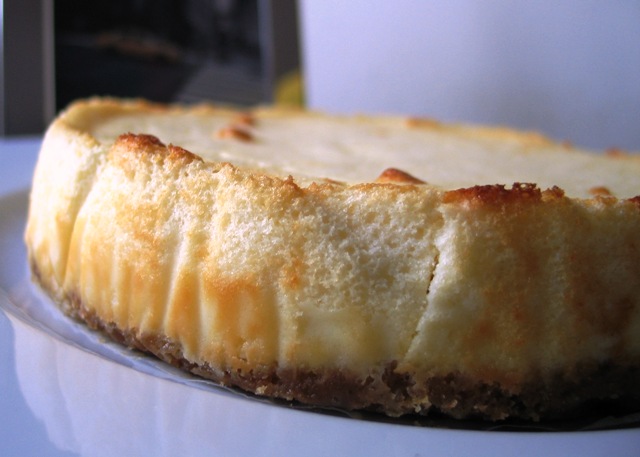
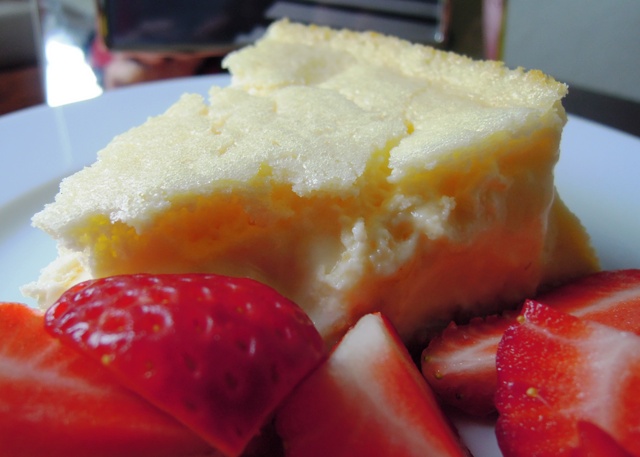
As the name says, these soufflés are double baked: first in ramekins in a bain-marie, and then again in a the cream sauce. So it’s no great disaster if your soufflés flop a little, as the double baking means they won’t end up all puffed up anyway. But they still taste beautifully light and airy, albeit rather rich and luxurious at the same time. They made for the perfect Saturday lunch, served with crusty bread and a simple salad, and they went down well with the children too – despite them containing spinach, which is not Mia’s favourite vegetable.

cheese souffles

Double baked Cheddar cheese soufflés

100g spinach, washed and finely shredded
300ml milk
40g butter
40g plain flour
salt and pepper
freshly grated nutmeg
50g mature Cheddar cheese
3 eggs, separated
butter for greasing

Topping
50g mature Cheddar cheese, grated
300ml double cream

If you’re using a conventional oven, preheat to 220°C/gas mark 7.

Place the spinach and milk in a pan and bring to the boil. Stir well, remove from the heat and leave to one side.

Melt the butter in a large pan. Remove from the heat and stir in the flour. Return to the heat and cook for a minute, stirring constantly. Add the spinach and milk, a bit at a time, and bring to a gentle boil, stirring all the time. Simmer to thicken the sauce. Remove from the heat and mix in the salt, pepper, a good grating of nutmeg, and Cheddar cheese. Once these are well mixed in, stir in the egg yolks.

In a large clean bowl, whisk the egg whites until stiff and then carefully fold into the sauce.

Generously butter six small ramekins and spoon in the souffle mixture. Place them in a small roasting tin and pour boiling water into the tin until it is halfway up the sides of the ramekins.

If you’re cooking in an Aga, place the bain-marie in the roasting oven on the grid shelf on the oven floor for 15-20 minutes. After 10 minutes of the cooking time, when the soufflés are a good golden brown colour, turn the tin around and slide in the cold plain shelf on the second set of runners. Cook until they are springy to the touch.

If you’re cooking in a conventional oven, simply place the bain-marie in the oven for 15-20 minutes and cook the soufflés until golden and are springy to the touch.

Remove from the oven and leave for 5-10 minutes in the ramekins to allow the soufflés to shrink back a little.

Butter a shallow ovenproof dish which is just big enough to take the soufflés without them touching. Sprinkle half the grated Cheddar onto the bottom of the dish.

Carefully remove the soufflés from the ramekins using a small palette knife and place in the ovenproof dish. Season the cream and pour over the soufflés. Sprinkle the remaining Cheddar on top and bake in the roasting oven if you’re using an Aga, this time without the cold plain shelf, or in your regular oven, for 15-20 minutes until the soufflés are golden brown.

Serve with bread and salad.

Double baked Cheddar cheese souffles

wells-food-festival-logo

As these double baked soufflés are not to be rushed and are best made when you have some time on your hands, they definitely fit the bill as a Weekend Slowie, which is the theme this month for the Family Foodies challenge over at Eat Your Veg. So here you are, Lou – hope you like them!

family-foodies

Chocolate meringues

chocolate meringue

One of my many and varied jobs at the moment is editing a magazine called Manna. I’m thoroughly enjoying working on the summer issue as the theme is Food & Farming, which means I get to talk to people across Somerset who are involved in producing our food.

One of the highlights so far has been interviewing an incredibly inspiring farmer called Anita near Clevedon in North Somerset. We chatted solidly for three hours about the rewards and challenges of running a farm while bringing up a family, stopping only when her husband popped into the kitchen to let us know one of the cows was calfing and to see if I’d like to take some action photos. Of course I jumped at the chance and I very nearly blubbed when the gorgeous little heifer came into the world.

As well as the herd of dairy cows, Anita also has free-range poultry. At the end of the interview she insisted I take away with me a huge tray of eggs. I loved the fact they were all sizes and colours. These are the ‘imperfect’ ones the supermarkets won’t take.

eggs

While we do appreciate eggs in our house, we’d have been hard pushed to get through this little lot, so I shared them with my good friend Sarah. We’ve been enjoying more than our usual quota of eggy breakfasts and I’ve made a batch of lemon curd. But of course, we also had to make meringues.

I’d seen a recipe for chocolate meringues on the BBC Good Food website and have been meaning to give them a try, so here was the perfect opportunity. Mine turned out nowhere near as neat and pretty but they tasted just the ticket; light and crispy and a little bit chewy. The plain chocolate also stops them from becoming overly sweet. Which means you can easily much your way through quite a few in one sitting.

The original recipe suggests you put all the meringue mixture into a piping bag and then “make a hole in the mixture all the way to the funnel tip. Pour the chocolate into the hole.” I don’t have the most delicate of touches admittedly, but I just couldn’t pull this off, even after several attempts. So instead I simply layered the meringue and the chocolate in the bag, which worked OK. If you can get it to work, please come back and tell me how you did it!

Next time I make them, I think I might try adding some chopped nuts to the chocolate. And maybe sandwich them together with some whipped cream for an indulgent dessert…

chocolate meringue

Chocolate meringues

This is a recipe I adapted for the Aga. For a conventional oven, take a look at the original recipe on BBC Good Food.

100g dark chocolate
4 egg whites
1 tbsp lemon juice
200g caster sugar

Break the chocolate into small pieces and place in a small bowl. Microwave on a low setting for a minute and then stir. Repeat again for another minute and so on, until the chocolate has just melted. Allow to cool a little while you move on to the eggs.

In a clean, large bowl add a tablespoonful of lemon juice to your egg whites and whisk until they form stiff peaks. Then add a tablespoonful of caster sugar and whisk it in, then whisk in another and repeat until you’ve worked in all the sugar. Your meringue will now be looking sumptuously thick and glossy.

Line a couple of baking sheets with greaseproof paper.

Spoon a little meringue into a piping bag and then pour in a little chocolate. Keep alternating until you’ve filled the bag. Pipe meringues onto the baking sheets about 4-5cm across, taking care to space them well. Keep going until you’ve used all your meringue mixture. Depending on how big your piping bag is, you may need to refill once or twice.

Start by baking the meringues at the top of the roasting oven for 5 minutes and then transfer to the bottom oven for 40-50 minutes. Check every now and again as you don’t want them too crunchy. I think they’re perfect when they’re still a little chewy.

chocolate meringue

Drop scones

drop scones

One of the best things about owning an Aga is being able to cook drop scones at the drop of a hat. Of course you don’t need an Aga to make drop scones, a frying pan will do, but there is something so very satisfying about making them direct on the hot plate itself, which of course is always hot and ready to go.

These drop scones are incredibly easy and take literally minutes to prepare. They’re just as good for a teatime treat as they are a weekend breakfast, and the children adore them.

The recipe I use here is from The Aga Book by Aga supremo Mary Berry, although she calls hers Scotch pancakes.

Aga drop scones

Drop scones

Makes around 20

100g self-raising flour
25g caster sugar
1 egg, beaten
150ml milk
Sunflower or vegetable oil for greasing.

Place the flour and sugar in a large bowl. Make a well in the middle and pour in the egg and half the milk. Mix well until it forms a thick batter and then mix in the rest of the milk.

Lightly grease the Aga simmering plate with a little oil, or grease a frying pan and place over a medium heat. When the fat is hot, use a tablespoon to carefully spoon the batter onto the plate or pan, spacing well apart. Cook for only around 30 seconds until tiny bubbles form on the surface, then use a spatula to turn them over. Cook again on the other side for another 30 seconds until golden brown.

Keep the drop scones warm until you’ve worked through all the batter and serve with whatever takes your fancy. We like ours with berries and either honey or golden syrup, or you might prefer a little butter and jam.

drop scones

Lemon meringue pie

lemon meringue pie

I’ve been meaning to try making a lemon meringue pie for ages now. I thought they were fussy, complicated puddings to make, but I finally got around to it last weekend and it turned out to be so much easier than I was expecting.

I used a recipe from master baker Dan Lepard, and it was indeed as simple as he promised. The pastry is perfectly light and crisp, while the meringue is soft, fluffy and marshmallow-like. I made one slight change and that was to add some lime juice to the proceedings. I like a lot of contrast in my lemon meringue pie. The meringue has to be verging on sickeningly sweet and so that must be counteracted with a really tangy sharp citrus. I like super tangy. Lime as well as lemon is perfect for that.

The pie went down well with the whole family, particularly Jessie who isn’t generally much of a pudding girl. She came back for seconds. And I enjoyed the leftovers for breakfast on Easter Monday – ever so decadent.

NB instructions for Aga cooks are at the end of the recipe.

lemon meringue pie

Lemon meringue pie

For the pastry

125g plain flour
½ tsp salt
25g icing sugar
75g butter
1 egg yolk
2 tsp cold water

For the lemon filling

100ml lemon juice
100ml lime juice
50ml orange juice
150g caster sugar
25g cornflour
3 egg yolks
25g butter

For the meringue

4 egg whites
125g caster sugar

To make the pastry, put the flour, salt and sugar in a bowl. Chop the butter into small pieces and rub into the flour. Mix in the egg yolk and water to form a soft paste. Wrap in clingfilm and chill in the fridge for half an hour.

Dan Lepard says to take a 20cm round deep tart case with a removable base but I used a cake tin. Grease your tart case or cake tin. Roll out the dough fairly thinly and line the tin’s base and sides. Press gently into the sides, trim the edges and then chill for another half an hour.

Preheat the oven to 170C or Gas Mark 3.

Line the pastry case with greaseproof paper and weigh down with baking beans. Bake the pastry case for 20 to 25 minutes. Then remove the paper and bake for another 5 to 10 minutes until the pastry is dry and golden. Leave to cool.

To make the filling, place the lemon, lime and orange juices in a saucepan with the sugar, cornflour and egg yolks and whisk until smooth. Place over a low heat and add the butter. Keep stirring while it comes to the boil. Pour the filling into the tart case, leaving a slight gap at the top. Leave to cool completely.

For the meringue, beat the egg whites in large bowl with an electric mixer until soft peaks form. Gradually add the sugar, a tablespoonful at a time, beating in well before the next lot of sugar goes in. You should end up with a thick and glossy  meringue.

Spoon the meringue on top of the lemon tart. With the oven still set to 170C or Gas Mark 3, bake for roughly 25 minutes until golden and the meringue has set but is still soft. Leave to cool before serving.

Aga instructions

If you’re using a two-door Aga like me, bake the pastry case on the floor of the roasting oven for 10 to 15 minutes, before removing the beads and baking for a further 5 minutes or so until the pastry is golden.

To cook the full pie, start it off in the middle of the roasting oven for about four minutes until the meringue turns a light brown. Then carefully move down to the top of the simmering oven for another 20 minutes until the meringue is set.

lemon meringue pie

If you liked this, you might also like to try:

Strawberry, rhubarb and lemon tart
Blackberry and cardamom pavlova
Peach pie
Peach pie

American-style baked cheesecake

Happy Fourth of July! Yes, it’s American Independence Day and so in honour of our cousins over the pond, here is my recipe for a baked American-style cheesecake.

I adore baked cheesecakes – the way the top is all cakey, soft and crumbly while the inside is sumptuously creamy and quite decadent. Matched with the crunchy biscuit base and sweet fruit on the side, what more could you ask for in a pud?

American-style baked cheesecake

Serves 6-8

For the biscuit base

75g digestive biscuits, crushed
40g butter, melted
35g Demerara sugar

For the cheesecake

45g butter, softened
150g caster sugar
400g cream cheese
20g corn flour
Pinch of salt
Zest of 1 lemon
1 tsp vanilla extract
3 eggs, separated
130ml double cream, lightly whipped

Fresh berries to serve

Preheat oven to 160°C/gas mark 3.

Lightly grease a 20cm loose-bottomed cake tin and line with greaseproof paper.

Put the crushed biscuits, butter and Demerara sugar into a bowl and mix well. Spread over the base of the tin and press down well. Place in the fridge for half an hour to set.

Into a large bowl measure the butter, caster sugar, cream cheese, corn flour, salt, lemon zest, vanilla extract and egg yolks and beat with a wooden spoon until smooth. Then fold in the lightly whipped cream.

Whisk the egg whites until stiff and then carefully fold into the cheesy mixture using a large metal spoon.

Pour the cheese mixture onto the chilled biscuit base.

Bake in the oven for about an hour until set. Turn off the oven and leave the cheesecake in there for another hour to cool.

If like me you have an Aga, then bake in the roasting oven on the shelf on the floor with the cold plain shelf on the second set of runners. Bake for 20 minutes until the top is pale golden. Transfer the cold plain shelf to the middle of the simmering oven and place the cheesecake on this. Bake for another 20-30 minutes. Thanks to Mary Berry for the Aga baking advice!

Remove the cheesecake from the oven and cool in the tin. Carefully run a knife around the edge, lift out from the tin and remove the greaseproof paper.

Serve with your favourite berries – I went for strawberries – I am eating it in Britain after all!