Happy Fourth of July! Yes, it’s American Independence Day and so in honour of our cousins over the pond, here is my recipe for a baked American-style cheesecake.
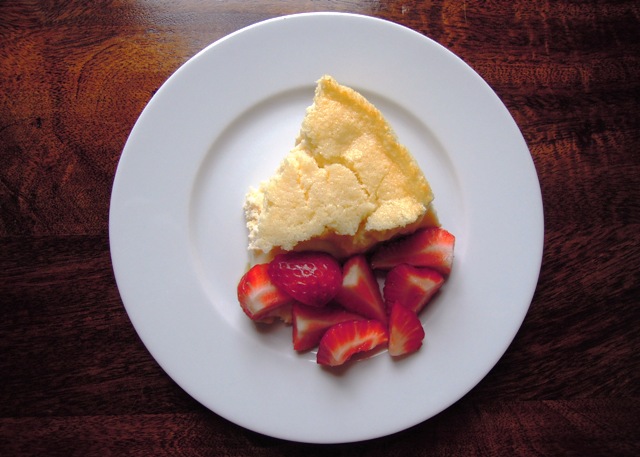
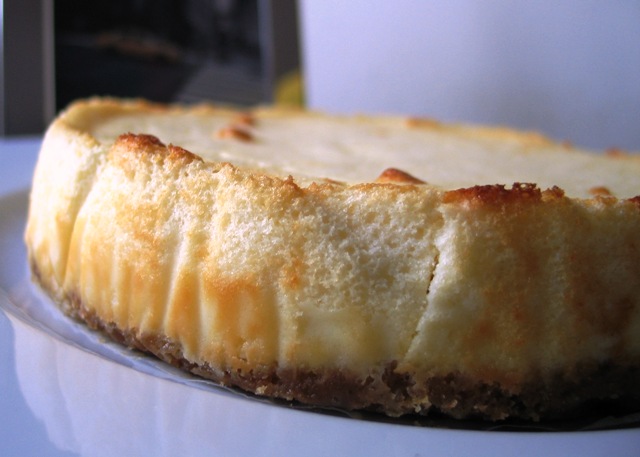
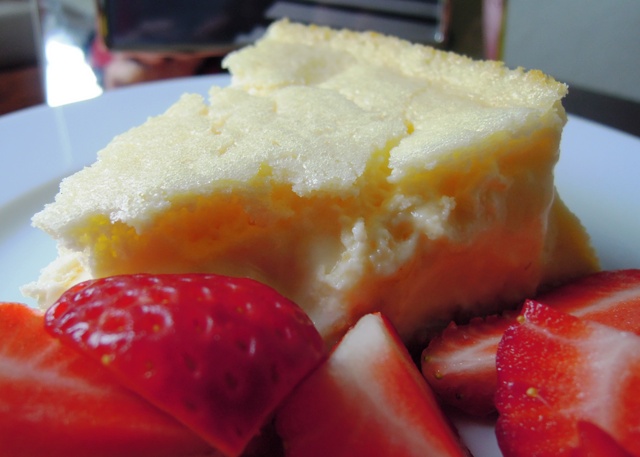
I adore baked cheesecakes – the way the top is all cakey, soft and crumbly while the inside is sumptuously creamy and quite decadent. Matched with the crunchy biscuit base and sweet fruit on the side, what more could you ask for in a pud?
Lightly grease a 20cm loose-bottomed cake tin and line with greaseproof paper.
Put the crushed biscuits, butter and Demerara sugar into a bowl and mix well. Spread over the base of the tin and press down well. Place in the fridge for half an hour to set.
Into a large bowl measure the butter, caster sugar, cream cheese, corn flour, salt, lemon zest, vanilla extract and egg yolks and beat with a wooden spoon until smooth. Then fold in the lightly whipped cream.
Whisk the egg whites until stiff and then carefully fold into the cheesy mixture using a large metal spoon.
Pour the cheese mixture onto the chilled biscuit base.
Bake in the oven for about an hour until set. Turn off the oven and leave the cheesecake in there for another hour to cool.
If like me you have an Aga, then bake in the roasting oven on the shelf on the floor with the cold plain shelf on the second set of runners. Bake for 20 minutes until the top is pale golden. Transfer the cold plain shelf to the middle of the simmering oven and place the cheesecake on this. Bake for another 20-30 minutes. Thanks to Mary Berry for the Aga baking advice!
Remove the cheesecake from the oven and cool in the tin. Carefully run a knife around the edge, lift out from the tin and remove the greaseproof paper.
Serve with your favourite berries – I went for strawberries – I am eating it in Britain after all!
Herbs on Saturday is one of my favourite bloggers’ challenges as it always attracts such diverse and delicious dishes, so I really must not let the side down! It is a simple and easy way to share recipes throughout the month that celebrate cooking with herbs, as well as a chance to pick up new ideas and discover new blogs and bloggers, and I hope you’ll join in the fun.
To enter all you have to do is add any recipe you have made during the week by emailing me with the URL for your post. And they don’t only need to be recipes made on a Saturday! At the end of each month, a ‘special blogger’ will choose their favourite recipe from all the entries, and the winning blogger will receive a fantastic cookbook as their prize. The full entry guidelines are below.
This beautiful book features 85 flavourful recipes for soups, salads, appetizers, fish, meat, poultry, vegetarian dishes, bread, biscuits, cakes, desserts and ice creams – all of course made with generous handfuls of fragrant fresh herbs.
There are classic dishes such as lamb with mint, and roasted tomato and mozzarella salad with basil dressing, as well as unusual combinations such as chicken with thyme and lavender. It includes a useful herb directory that identifies some of the best-known and most useful culinary herbs, as well as delicious flowers, fruits and spices to pep up a plain meal.
So, to get the ball rolling here’s my recipe for a lovely summery salad with oregano – just wish we had the weather to go with it!
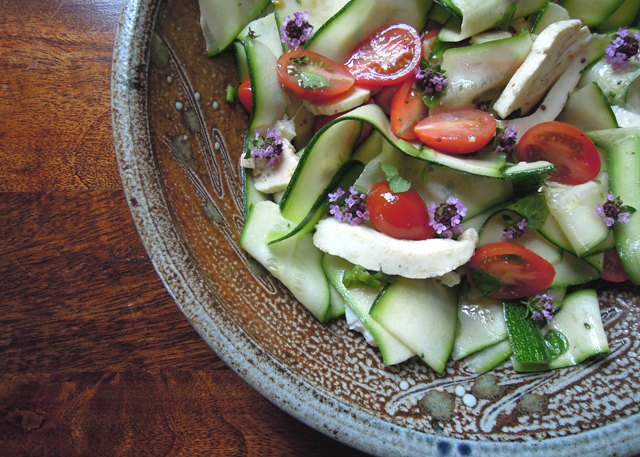
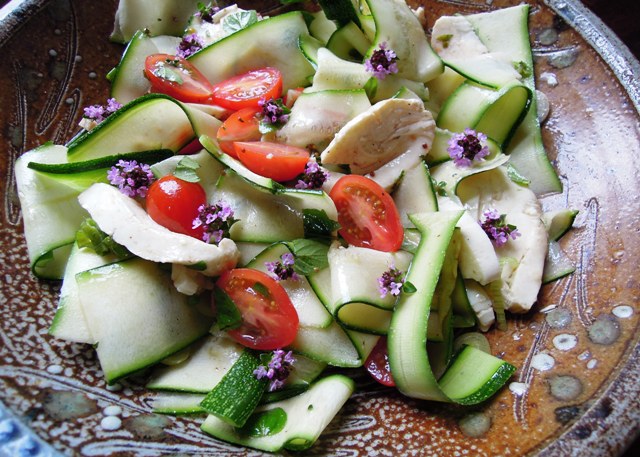
Courgette and oregano flower salad
This fresh, light salad features delicate oregano flowers, as well as the leaves. The crunch of the courgette with the soft mozzarella cheese and juicy tomatoes is a sensational combination.
Make sure you slice the courgette as thinly as possible as it is eaten raw in this salad. It’s best to use a mandolin on its thinnest setting. And use the smaller, firmer courgettes if you can.
Serves 4
For the dressing
6 tbsp extra virgin olive oil
2 tbsp white wine vinegar
1 tbsp wholegrain mustard
1 clove garlic, peeled and crushed
Salt and pepper
4 or 5 courgettes, very thinly sliced lengthways
250g baby plum or cherry tomatoes
2 spring onions, thinly sliced
300g mozzarella, thinly sliced
Handful oregano leaves, picked
Handful oregano flowers, picked
To make the dressing, simply put the ingredients into a jam jar, screw the lid on tightly and give it a really good shake.
Place your salad ingredients (except for the flowers) into a large serving bowl, pour over the dressing and toss well. Carefully decorate with the oregano flowers.
This is a lovely salad to serve with grilled fish or chicken, or on its own with crusty bread to soak up the juices.
Herbs on Saturday for July – guidelines on how to enter
Send your recipe URL to me at vanesther@reescommunications.co.uk, including your own email address and the title of your recipe or post. The closing date is Monday 30 July.
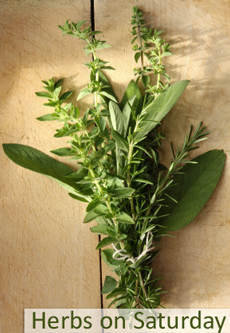
Display the Herbs on Saturday badge (as shown above and below) to the relevant recipe post, with a link back to this post and also to the challenge page over at Lavender & Lovage.
Email me as many recipe links as you like, there is no limit and the recipes and posts can be from any day, not just Saturday!
If you tweet your post, please mention #herbsonsaturday, @BangerMashChat and @KarenBurnsBooth in your tweet – I will retweet all that I see.
The recipe can be one of your own or one you’ve seen elsewhere. You are welcome to republish old recipes/posts but please add the information about this challenge as listed above with the Herbs on Saturday badge.
As entries come in, links to these will be added to this page and at the end of the month there will be a round-up of all entries received.
Hopefully that’s all crystal clear, but if not let me know. I’m really looking forward to receiving your entries for Herbs on Saturday! Come on, let’s get herby!
Lots of people have been talking about strawberries and rhubarb making a winning combination, so when my lovely friend Sarah gave me a big bunch of rhubarb from her garden the other week, I thought it was about time I found out what all the fuss is about.
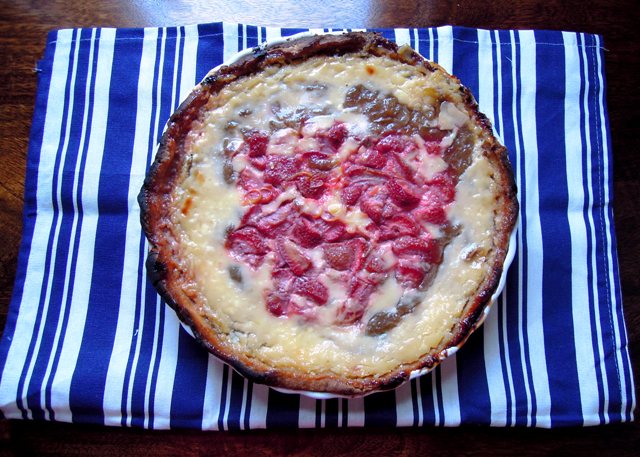
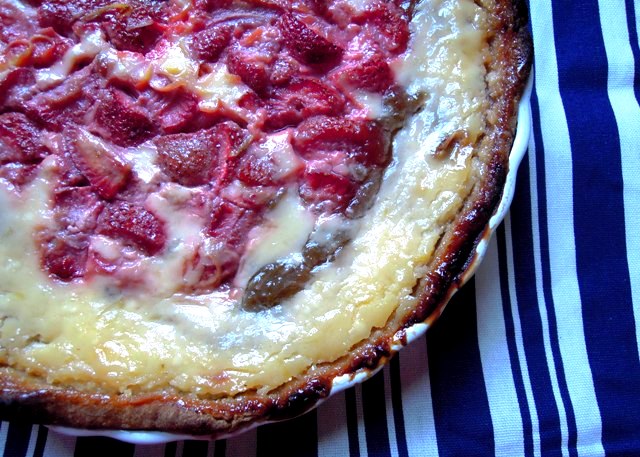
They weren’t wrong. Sweet strawberries are the perfect foil for the tartness of rhubarb. And for me the creamy tanginess of a lemon tart provides a perfect base for this fruit frenzy.
Alright, I have to admit though my strawberry, rhubarb and lemon tart isn’t the prettiest pudding around. Presentation, particularly when it comes to sweet things, isn’t always my strong point. And I did slightly over-colour the pastry. But then, I am a home cook after all. As long as it tastes good, then I’m happy. Very happy in fact.
Strawberry, rhubarb and lemon tart
Serves 8
For the pastry case
125g soft butter
100g icing sugar
Pinch of salt
250g plain flour
2 egg yolks
2 tbsp milk
600g rhubarb, chopped into inch-long chunks
6 tbsp granulated sugar
Splash orange juice
400g strawberries, hulled and quartered
170g caster sugar
4 eggs
170ml double cream
Juice and grated zest of 3 lemons
Start by making the pastry. In a large bowl, cream together the butter, icing sugar and salt. Then add the flour and egg yolks and rub in until the mixture resembles coarse breadcrumbs. Add the milk and work together to form a dough.
Wrap the dough in cling film and rest in the fridge for 30 minutes.
Preheat the oven to 180ºC/gas mark 4.
Grease a 30cm tart dish. Roll out the pastry into a large circle and carefully line the dish, pressing the pastry into the edges and making sure it comes fully up the sides. You may need to do some patching up here and there – I always do.
Blind bake the empty tart for 15 minutes until the pastry is coloured ever so slightly. Then leave to one side while you prepare the filling.
Place the chopped rhubarb in a saucepan with 4 tablespoons of granulated sugar and a splash of orange juice and heat gently. Cook for 10 to 15 minutes until the rhubarb is tender but still has a little bite in it.
In a bowl, scatter 2 tablespoons of granulated sugar over the chopped strawberries and gently mix together.
Whisk together the caster sugar and eggs in a large bowl and then stir in the cream, lemon juice and zest.
Spoon the strawberries into the middle of your pastry tart and arrange the cooked rhubarb around this. Then pour over the creamy lemon mixture and carefully transfer this to your oven. You should do here as proper chefs suggest and pour in the mixture when the tart is already in the oven to reduce spillage, but I invariably forget this bit and have to mop the floor afterwards.
Bake for around 45 minutes until the filling is firm but still has a little wobble to it, and if you can (unlike me) catch it before the pastry turns too dark around the edges. But hey, don’t worry if it does. My dad always told me the burned bits were good for your insides.
Leave to cool for an hour or so while the filling sets some more. Serve with some vanilla ice cream or a dollop of creme fraiche.
I’m entering this tart into the Tea Time Treats blog challenge hosted by What Kate Baked and Lavender & Lovage, as the theme this month is Summer Fruits. As Wimbledon approaches, what fruit could better represent the British idea of summer than the ubiquitious strawberry?
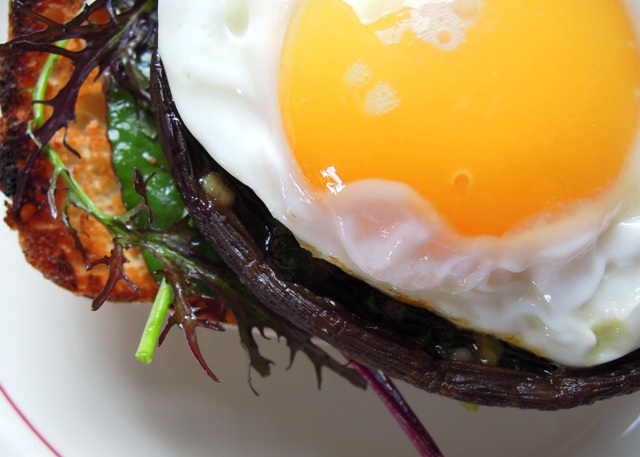
Here’s an easy way to put a smile on Dad’s face this Father’s Day (Sunday 17 June in the UK). Toasted ciabatta topped with a portobello mushroom baked in garlic butter and a heart-shaped fried egg. The perfect way to start the day; after a lie-in and a cup of tea in bed, of course.
To make the garlic butter simply crush a clove of garlic and mash into a decent knob of butter. Add some chopped, fresh parsley if you happen to have some. Smother this onto a portobello mushroom and bake in a hot oven for 15 minutes.
Cut a ciabatta roll in half and toast.
Place a handful of salad leaves in a bowl and toss with a little vinaigrette.
Fry an egg just how Dad likes it – sunny side up or over easy. I cooked mine in a cute heart-shaped frying pan or you could fry your egg as normal and then cut it out with a heart-shaped pasty cutter.
To assemble, simply place the ciabatta on a plate and cover with some dressed leaves. Carefully place the mushroom on top of the leaves and spoon over some more of the gorgeous garlic butter.
Finally, place the fried egg on top and serve, along with a copy of the Sunday papers. Enjoy!
It’s Father’s Day in the UK this Sunday. Normally when I’m planning what to cook on Father’s Day, my thoughts turn to light, summery meals we can eat outside in the garden. Perhaps a barbecue? But the weather forecast for this weekend doesn’t look good. I heard on the radio that they’re expecting three months’ worth of rain to fall over the next three days. Splendid.
So my offering for a Father’s Day meal this Sunday might not be what you’d typically expect to be serving up in June, but it’s perfect comfort food guaranteed to put a smile on Dad’s face on a soggy, grey afternoon; followed perhaps by the chance to doze on the sofa in front of James Bond. Perfect.
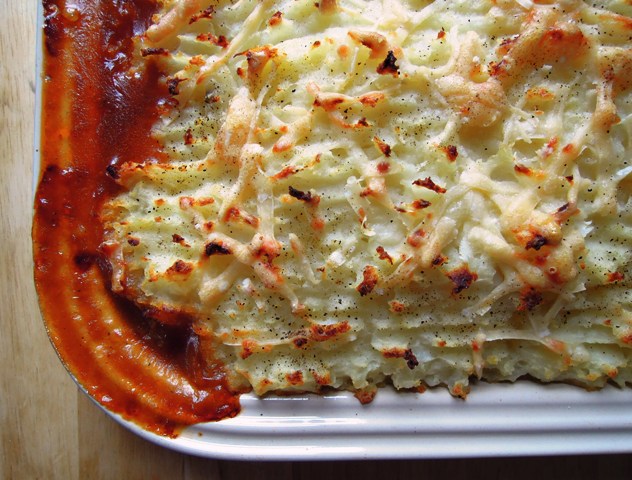
This bangers and mash bake is simply a sausage casserole baked in the oven with buttery mashed potato on top, rather like a cottage pie. It’s very satisfying and, of course, very popular in our house. For this recipe, I’ve gone with peppers and green cabbage in the casserole but use whichever vegetables you fancy really; courgettes, carrots, swede and beans all work well.
It’s also a great dish to prepare in advance. Simply pop in the oven half an hour or so before you’re ready to eat. And the leftovers freeze really well too.
To cool dads the world over – Happy Father’s Day!
Bangers and mash bake
Serves 4 (two big, two small)
3 tbsp vegetable oil
6 good quality pork sausages
1 large onion, peeled and chopped
1 red and 1 green bell pepper, deseeded and chopped
1 tbsp corn flour
750ml beef stock
1 tbsp balsamic vinegar
Good squeeze of tomato puree
Half green cabbage, shredded
Salt and pepper
1kg potatoes, peeled and chopped
50g butter
Splash of milk
50g Cheddar cheese, grated
Preheat the oven to 200ºC/gas mark 6.
Heat one tablespoonful of oil in a large heavy-bottomed pan over a moderate heat and brown the sausages. Remove to a warm dish.
Add the rest of the oil to the same pan and fry the onion until soft and golden. Throw in the red and green pepper and fry for a couple more minutes.
Return the sausages to the pan and stir in the corn flour. Cover with the beef stock, balsamic vinegar and a good dollop of puree and stir well.
Add the shredded cabbage and stir in. Bring to a gentle simmer and cook uncovered for about 25 minutes to let the casserole thicken. Season to taste.
Meanwhile boil the potatoes in a large pan of salted water until tender. Drain and return to the pan. Add the butter, a splash of milk and salt and pepper to taste, and mash well.
In a large oven-proof dish, firstly arrange the sausages to make sure everyone gets a fair share in their helping.
Then add the rest of the casserole. Spoon over the mashed potato (it does help if the casserole has had a little time to cool first), and tidy up with a fork. Go wild and create fancy patterns with your fork while you’re at it. Lastly sprinkle with the grated cheese.
Bake in the oven for 30-40 minutes until the mashed potato and cheese are beginning to brown on top and go crispy. Serve and enjoy!
Homemade pizza is a regular on the menu in our house. The children like to get involved in making it, especially kneading the dough and putting on the toppings. As you can imagine, it can turn into quite a messy affair!
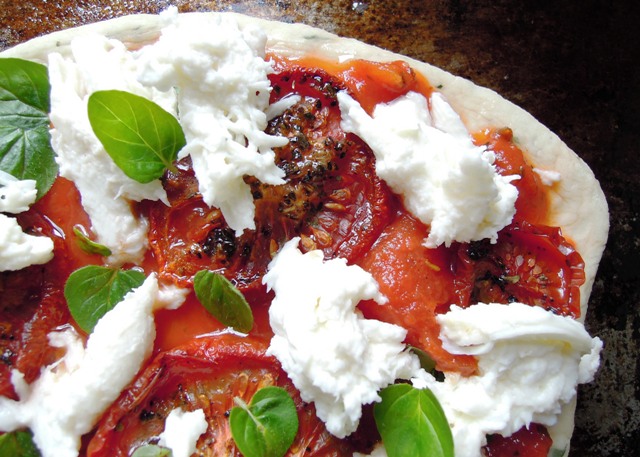
This recipe for slow roast tomato and oregano pizza is a firm family favourite and the perfect way to put to good use all those gorgeous tomatoes and herbs coming into plentiful supply this time of year.
We have lots of beautiful oregano in the herb garden at the moment
You do need to plan ahead a little with this one. The tomatoes are slow roasted in a low oven for four to five hours, giving them an incredibly intense, sweetly caramelised flavour and a gorgeously sticky, slightly chewy texture.
Trust me, it’s worth the effort. They taste sublime and are fantastic on pizza, as well as in salads, quiches or served with olives and cold meats as part of an antipasto.
Slow roasted tomato and oregano pizza
Makes four pizzas
For the slow roasted tomatoes:
8 cherry tomatoes
6 medium tomatoes
2 tbsp olive oil
2 tsp dried oregano
2 tsp sugar
salt and pepper
For the dough:
400g strong white bread flour
1 tsp salt
1 x 7g sachet fast action dried yeast
2 tbsp chopped fresh oregano
250ml luke warm water
1 tbsp olive oil
For the topping:
Passata, about half a jar
Mozzarella, 2 x 250g balls
Two handfuls fresh oregano, leaves picked
Firstly, prepare the tomatoes – I suggest the night before.
Preheat the oven to 140°C /Gas Mark 1 or use the bottom oven of an Aga.
Cut the tomatoes in half and place on a baking sheet. Drizzle over the olive oil, and sprinkle on the oregano and sugar, and season to taste. Place in the oven and roast for four to five hours, until the tomatoes are shrivelled but still sweet and juicy.
To make the pizza dough, put the flour, salt, dried yeast and oregano into a large mixing bowl and mix well.
Make a well in the middle and pour in the lukewarm water and oil. Gradually work the flour into the liquid, making a soft dough. If it’s too dry, add a drop more water. If it’s too sticky, add a little more flour.
Flour your surface before tipping the dough onto it. Knead the dough by stretching it away from you, then pulling back into a ball. Do this for five minutes or so, until the dough is smooth and elastic.
Return the dough to the mixing bowl, cover loosely with cling film and put in a warm place for about an hour, until the dough has doubled in size.
Preheat the oven to 200°C/Gas Mark 6 or use the middle of the top oven of an Aga.
Uncover the risen dough and punch it back down. Flour the surface again and divide the dough into four balls. Stretch or roll out each ball until you have a thin circle about 22cm across. Place the pizzas onto slightly oiled baking sheets.
Pour a couple of tablespoons of passata onto each pizza, smoothing out with the back of the spoon. Next add the roast tomatoes and oregano leaves and finish with torn pieces of mozzarella.
Bake your pizzas for 15-20 minutes and leave to cool for a couple of minutes before devouring.
I’m entering this tasty pizza into the June Herbs on Saturday blog challenge over at Lavender & Lovage. Karen always receives heaps of delicious looking recipes for her blog challenges, so make sure you go and take a look at the other entries!
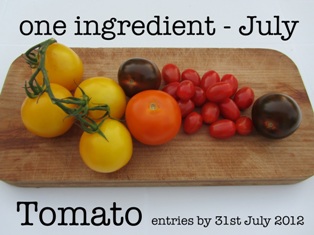
I’m also adding it to the One Ingredient blogging challenge, as the ingredient in question is the tomato. The challenge is run by Laura at howtocookgoodfood and Nazima at Londonworking mummy.
Sometimes I am unashamedly girly and I make the most of the fact I have two young daughters as a good excuse to play with pink, fluffy, sparkly, flowery things.
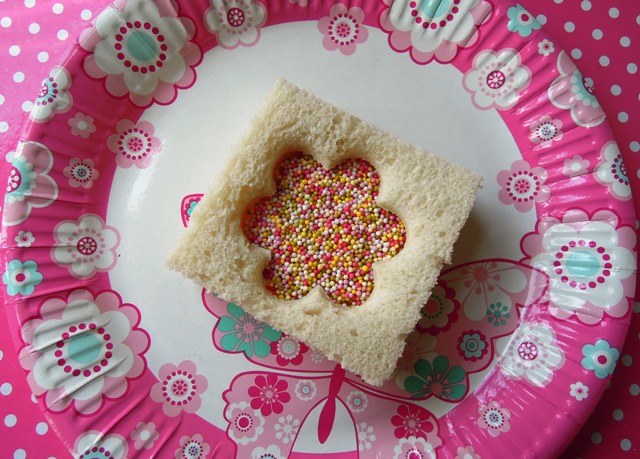
When I happened upon Le Frufru’s beautiful blog recently, as I traced the source of some pretty pictures I’d come across on Pinterest, I fell in love with her sugary sweet sandwiches for children’s parties. I had to give them a go myself. My photographs are nowhere near as beautiful as the originals but you get the general idea.
I haven’t had the opportunity yet to actually make them for a party. I simply made them to give to the girls at tea time. And you can imagine how much they enjoyed them. Especially the way the hundreds and thousands clung to their lips as they took a bite.
Le Frufru’s blog is written in Italian and so I’m not entirely sure how she made her sandwiches but it doesn’t look complicated, does it?
I made mine by firstly trimming the crusts off white bread. Next the slices were cut into small squares and spread with butter. Using a flower-shaped pastry cutter, I cut out floral holes in half the squares and spread the remaining squares with runny honey. Finally I topped the honey slices with the floral slices and sprinkled into the hole a generous amount of hundreds and thousands.
Despite there being no baking involved, I’m entering these dainty little sandwiches into the Tea Time Treats blog challenge organised each month by Lavender & Lovage and What Kate Baked. This month Karen at Lavender & Lovage is hosting and the theme for May is Floral Flavours & Flowers. I thought my girly nibbles might (just) fit the bill.
Whether you make them for a girlie birthday party, a Jubilee street party, a dolls’ tea party or just a plain old back-from-school treat, I hope you enjoy! And of course you can use any shaped cutter you fancy, and use chocolate sprinkles instead of the classic hundreds and thousands.
I’m feeling strangely patriotic. I’m actually thinking of putting up some Union Jack bunting around the house. Now anyone who knows me will understand how out of character this would be. But I have to admit – I’m being swept along with this Jubilee fever. Or perhaps the sun this week has simply gone to my head?
Everywhere you go, the red, white and blue theme is all pervasive. Every shop window, every catalogue, every advertisement – it all makes you proud to be British, in a kind of embarrassed, rather British sort of way, when we’re not sure we should but we want to go along with it anyway.
I’m not sure how much my children understand what it’s all about. It’s something to do with the Queen. It’s not her birthday but it’s something similar. Whatever the reason, it’s a good excuse for a party and what kid is going to knock that?
Jessie’s bunting for her school Jubilee party
Most food blogs I’ve visited recently are getting into the full Jubilee spirit, sharing amazing and clever culinary creations for impressing the neighbours at the street party. So I began to think maybe I should be doing something too. In fact, it’s been the last thing I’ve been thinking about as I drop off to sleep for the last few nights now.
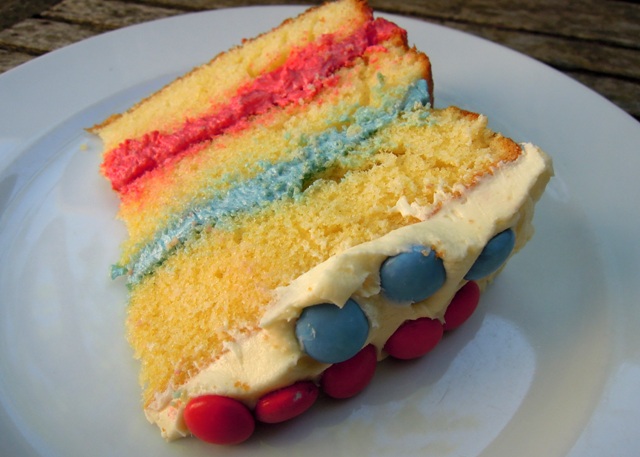
As you know, I’m not a particularly talented baker, so I’ve come up with a easy party cake to suit my limited baking skills, which still delivers the ‘wow’ factor for a juvenile audience. It’s not sophisticated, it’s not refined. It’s quite simply a big, white cake with red and blue running right through it. And it’s sweet and gooey and moreish with a tonne of Smarties on the top.
My daughter Jessie walked into the kitchen just as I finished decorating it, and her reaction was “Wow!” which was exactly the response I was after. From a child anyway. My husband on the other hand was rather less complimentary about my efforts. But I hadn’t made it for him so I didn’t care. Much.
It’s three tiers of simple Victoria sponge (based on Nigella Lawson’s recipe), smothered in red, white and blue buttercream, and embossed with red and blue Smarties in a crude Union Jack design. Great for Jubilee parties, especially the kind involving lots of young children.
Queen’s Jubilee Party Cake
For the Victoria sponge
330g soft butter
330g caster sugar
juice of half a lemon
6 eggs
300g self-raising flour
40g corn flour
1½ tsp baking powder
6 tbsp milk
For the buttercream icing
280g soft butter
560g icing sugar
3-4 tbsp milk
red and blue food colouring
Plus
Lots of red and blue Smarties to decorate (I needed three ‘share’ bags to get enough reds and blues)
Preheat the oven to 180ºC/gas mark 4.
This couldn’t be easier. Put all the Victoria sponge ingredients except for the milk into a food processor and whiz until you have a smooth mixture. Then add the milk a spoonful at a time, whizzing to combine each time, until you have a good dropping consistency.
Grab your three 20cm sandwich tins. If they’re not non-stick, grease and line them, but if they are, job done. Pour in the cake batter across the three tins equally. Bake in the oven for 20-25 minutes until the cakes are golden and springy to the touch, and a skewer inserted into the middle comes out clean.
Leave to cool on a wire rack for 10 minutes, then remove the cakes from the tins and leave on the rack to cool completely.
To make the buttercream icing: beat the butter until soft in a large bowl. Add 70g of icing sugar and beat until smooth. Add another 70g and beat again. And again add the remaining 140g of icing sugar and beat well until smooth.
Finally add the milk and beat again to loosen the mixture. Put half the mixture into a separate bowl and set aside.
Split the remaining buttercream into two more bowls. Add red food colouring a few drops at a time to one lot until you get a colour you’re happy with the tone. Repeat with the other bowl with the blue food colouring.
If you’re cakes are well-risen and peaked, you’ll need to use a sharp knife to shave them a little until they’re nice and flat. Enjoy the sponge shavings as a chef’s perk, as Nigella would say.
Put your first cake layer on a large plate, and carefully smother with the red icing almost to the edge but not quite. Place the next sponge layer on top and repeat again with the blue icing. Then add the next layer of cake and smother with a generous topping of the plain coloured buttercream icing.
Decorate the top of your cake with your red and blue Smarties. I attempted a Union Jack style motif but go with whatever takes your fancy – concentric circles, spirals, stripes, random patterns – go crazy!
And just in case you’re reading this, a very happy Diamond Jubilee your majesty!
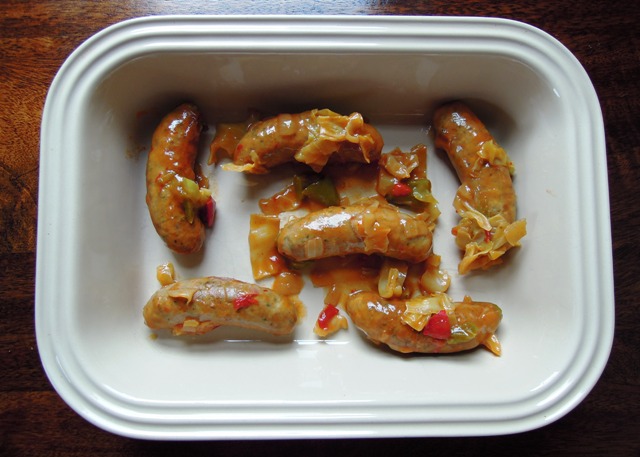
My family is rather partial to the odd sausage or two. Or three. In fact, we eat rather a lot of them in our house. And now that I’m trying to be a bit more creative with our food, I’m always on the look out for new ways to present the humble banger. This sausage, carrot and fennel bake, which first started life as a Leon vegetarian side dish, is a great meal.
I love Leon. I love their style, their ethos, their food. If I lived in London and had rather more money, I’d be eating there all the time. But as I don’t on either count, I have to make do with their cookery books. Leon’s focus is on fabulous ingredients:
When we first started Leon… we tried to imagine what a high-street fast food joint might be like in heaven: a place where fresh unprocessed, satisfying meals are served with pride. (From ‘Naturally Fast Food’)
That says it all. Leon’s approach to food is definitely the Bangers & Mash approach. My food might not always hit the same culinary heights but I’m aiming in the same direction at least.
In Leon’s Naturally Fast Food, there’s a delicious recipe for roast carrots and fennel in parmesan breadcrumbs. I discovered it on one of those common occassions when an item arrives in the veg box and I desperately needed ideas on what on earth to do with it. The item this time was a fennel. Obviously any proper foodie worth their salt would be going wild with excitement at all the possibilities presented by a fennel. I just needed to find something that the kids might actually eat. And this recipe worked a treat.
After making this dish a few times, it occurred to me that with the simple addition of a few sausages, this side dish could become an easy one-pan main meal. I tried it and it worked. One of my more successful experiments. So here it is. My sausage, carrot and fennel bake, with a little help from the kind people at Leon.
Sausage, carrot and fennel bake
Serves 4
8 good quality pork sausages
500g carrots, peeled and cut into diagonal chunks
500g fennel, trimmed and cut into wedges
4 tbsp olive oil
a handful of fresh rosemary, leaves picked
100g stale white bread (if you only have fresh, bake a couple of slices in a low oven for 1o minutes)
4 cloves of garlic
salt and pepper
50g parmesan cheese, grated
Preheat the oven to 220ºC/gas mark 7.
Put 2 tbsp olive oil and the sausages into a large roasting tin and bake in the oven for 10 minutes.
In a bowl, toss the carrots and fennel in the remaining oil. Turn the sausages and then add the carrots and fennel to the roasting tin along with 75ml of hot water.
Put back in the oven for 15 minutes, then turn the vegetables and sausages and return again for another 10 to 15 minutes, until the carrots and fennel are tender and the sausages are browning.
Into a food processor, place the stale bread, rosemary, garlic, salt and pepper and blitz until you have fine, herby breadcrumbs.
Once the sausages and vegetables are cooked, sprinkle over the breadcrumbs and then scatter over the parmesan. Return to the oven for a further 10-15 minutes until the topping is golden and crispy. And serve.
For a slightly different take on the same dish, head over to Emma’s Kitchen. The lovely Emma saw a picture of my sausage and fennel bake on this blog a couple of weeks ago and rustled up her own version. It’s quite similar but she uses ciabatta for the topping and also parsnip and onion. I’ll definitely be giving it a try sometime soon!
I really have to be in just the right mood to cook with my children.
Cooking with children is supposed to be a joyful, carefree time; one of those warm, fuzzy memories you hope your kids will hold dear when they’re all grown up. If you google cooking with children, practically every result features the word fun. But unless I’m in just the right mood, cooking with children is anything but.
When my daughters were younger I would force myself to involve the children in kitchen activities, because that’s what good, wholesome mothers do. But just minutes into our chosen cookery adventure, I’d feel my temper rapidly rising as the kitchen grew messier, as egg shell started flying everywhere, as more chocolate chips ended up in mouths than in the bowl, and as the arguments started about whose turn it was to stir.
I know it’s important to get children active in the kitchen from an early age. But I’ve learned to choose my moments carefully, particularly with pre-schoolers. Children are going to make a god awful mess in the kitchen and there’s no getting around that.
And if they’re not making a mess, it’s questionable as to whether they’re actually having any fun. So I only cook with the kids if I’m in the mood to let go and embrace the ensuing chaos; prepared to accept the fact that I’ll be finding hundreds and thousands strewn across the house, to be discovered in every available nook and cranny for weeks afterwards.
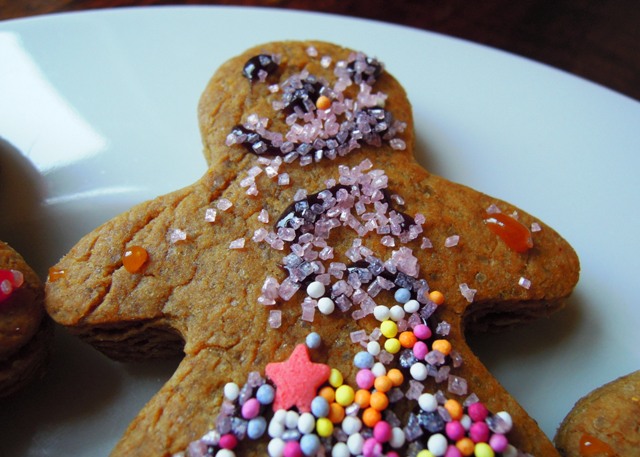
But on those days when I am in the mood to just go with it, cooking with the children can be wonderful. Especially of course if there is any kind of decorating required, as with these gingerbread men I made with Jessie and Mia recently. It was a rainy Sunday and we didn’t get out of our pyjamas all day long. Baking gingerbread men just presented itself as the perfect lazy Sunday activity.
I love the look of concentration on Mia’s face in this picture. She’s not generally known for her focus or attention span, so I was rather impressed with her dedication in ensuring each of her gingerbread men was carefully covered from head to toe in stars and sprinkles.
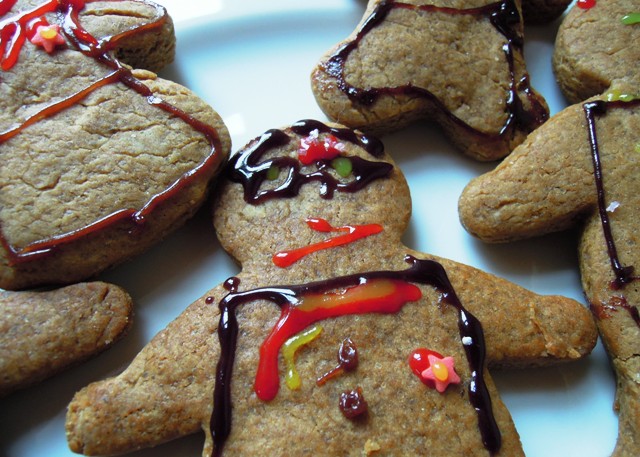
Jessie’s gingerbread men on the other hand were decorated as the cast of Harry Potter. Can you spot Harry?
And yes, that is of course, a lightning-shaped scar on his forehead. Not 100% sure though about the sheriff badges. Or are they nipple piercings, as someone suggested when I put a photo on Twitter?!
So if you do find yourself in just the right mood for some fun in the kitchen with the kids, here’s just the right biscuit recipe…
Gingerbread men
350g plain flour
1 tsp bicarbonate of soda
2 tsp ground ginger
1 tsp ground cinnamon
125g soft butter
175g demerara sugar
1 large egg
2 tbsp treacle
2 tbsp golden syrup
writing icing in a variety of colours
decorations – hundreds and thousands, edible stars and shapes, Smarties etc
Sift the flour, bicarbonate of soda, ginger and cinnamon into the bowl of a food processor. Then add the butter and blend until you have a mixture resembling breadcrumbs. Mix in the demerara sugar.
Lightly beat the egg and add to the food processor along with the treacle and syrup. Blend until the mixture comes together as a dough.
Tip out the gingerbread dough and knead gently until smooth. Wrap in clingfim and put in the fridge for 15 minutes.
Preheat the oven to 180C/Gas 4 and line two baking trays with greaseproof paper.
Lightly flour your surface and roll out the dough until it’s about half a centimetre thick. Using your gingerbread men (and women) cutters, cut out your shapes and place on the baking tray.
Bake for 15 minutes until golden-brown, swapping the trays around half way through to make sure they bake evenly. Leave to cool on the tray for 10 minutes, then move to a wire rack. When completely cooled go wild decorating them with the writing icing and decorations.