If you’re a regular reader of this blog, you’ll know I’ve only discovered my cooking mojo in the last few years. I spent a long time feeling out-0f-place in the kitchen. But I do believe I’ve arrived and earned my right to wear a pinny (although I generally forget to until it’s too late). Don’t get me wrong, I’ll never be a great cook and I won’t be entering Masterchef anytime soon, but I think I might be turning into a good cook. Indeed, in a restaurant the other evening, my husband told me he thought my cooking was better. I was ever so slightly on the chuffed side.
Omelettes were always one of those dishes I had trouble with. Well, rather I assumed I would if I actually plucked up the courage to try making one. Yes I know they’re quick and simple, but only if you’re a proper cook. Or so I thought. In recent months, I’ve made myself learn how to make a good omelette because I realise they are the ultimate fast food. After one or two duds along the way, I’ve worked out they’re not all that difficult after all. It’s all about trial and error and not being afraid to make a few mistakes. If you don’t make mistakes, how can you find out what works and what doesn’t?
We now eat a fair few omelettes in our house. Our life can get pretty manic, what with school and work and all the various out-of-school clubs and activities, not to mention some attempt at a social life; so it’s good to have a speedy and adaptable supper up your sleeve. They also make the perfect brunch dish, when you fancy something warm and tasty but don’t want to go to too much effort.
Now that I’m turning into a bit of an omelette fanatic, I was rather pleased when Littlewoods sent me a set of Russell Hobbs pans to test out – a frying pan and an omelette pan*. After many years, the non-stick coating on our old pan had given up the ghost, and omelettes aren’t so great when you don’t have a non-stick pan. At just £27 for the pair, they do seem a bit of a bargain. At first, when the pans arrived, I thought they were a little on the lightweight side, but having used them a few times now, I can confirm they are pretty decent pans. How long they’ll remain non-stick with the amount of wear and tear they’ll get in my kitchen remains to be seen, but for now they certainly turn out a good omelette.

I enjoy trying out new fillings for my omelettes. This latest concoction was simply a way of using up a few bits and bobs in the fridge. It worked out rather well so I think I’ll be adding it to my tried-and-test list.
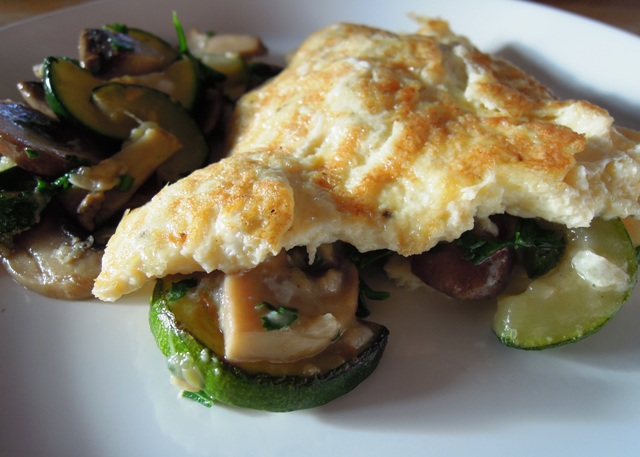
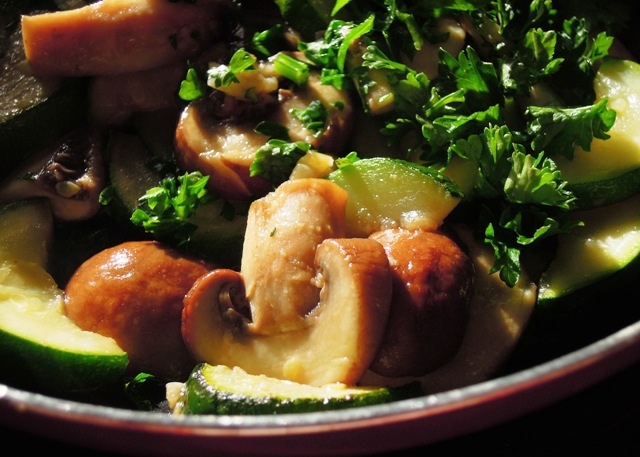
Courgette and mushroom omelette with garlic and parsley
Serves 2
olive oil, a couple of glugs
1 courgette, halved lengthways and sliced
handful of chestnut mushrooms, sliced
2 cloves of garlic, peeled and crushed
handful of fresh parsley, roughly chopped
knob of butter
4 eggs, lightly beaten and seasoned with pepper
Heat a glug of olive oil in a frying pan over a medium heat and gently fry the courgette until softened. Throw in the mushrooms and soften these too before adding in the garlic and parsley. When the garlic is golden, take off the heat and keep warm to one side.
In your omelette pan, heat another glug of olive oil with the knob of butter over a fairly high heat. Pour in the beaten egg and leave for a few seconds to give it time to ‘catch’.
Then using an implement that won’t scratch your lovely non-stick pan (my weapon of choice is a rubber spatula!), start dragging the edges of the eggy mixture into the middle, going round and round, and letting the runny egg fill in the gaps you are leaving. As the omelette starts to firm up, tilt the pan to encourage the uncooked egg to flow into the spaces.

When the only runny egg left is on the surface, leave it for 30 seconds or so to continue cooking, and then it’s time to add your filling.
Pour the mushroom and courgette mixture over one half of the omelette and carefully fold over the other half. Cut in half and slide out onto warmed plates. Enjoy!
![]()